Record sprint workouts
Configure the recorded course, understand device-started runs and partial laps, then save sets and finish the sprint workout.
Use Training → Sprint for an on-the-fly sprint workout. Each recorded run is a set within it. Alternatively, perform a sprint prescription inside Workout to keep it with the rest of a mixed session.
Sprint recording needs compatible Vitruve Speed hardware and the organization’s Timing Gates feature.
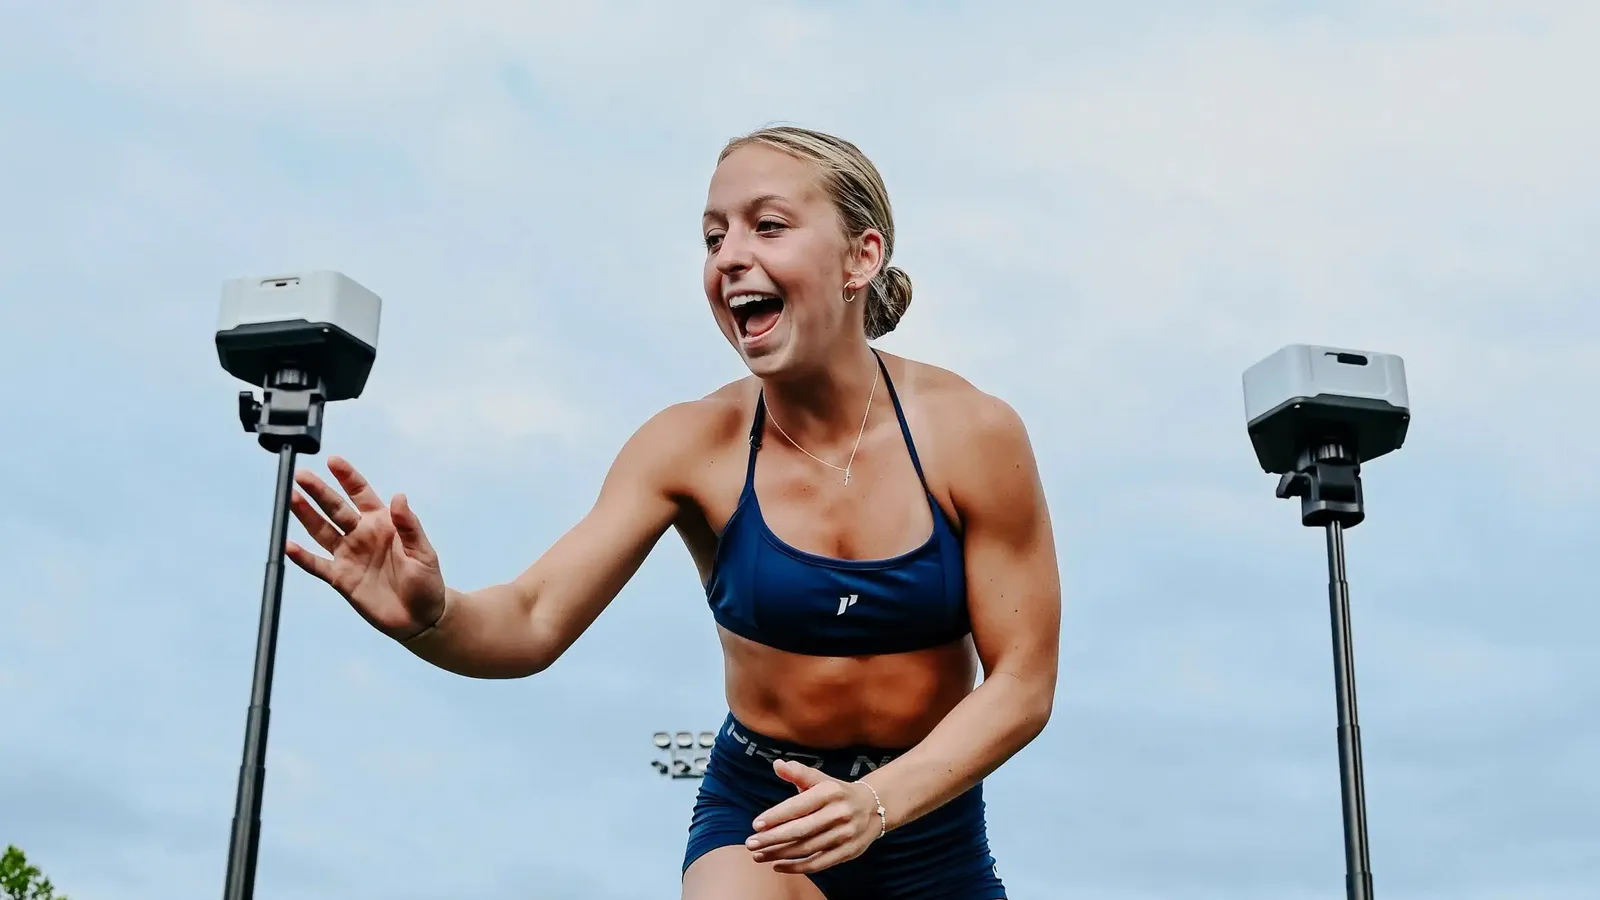
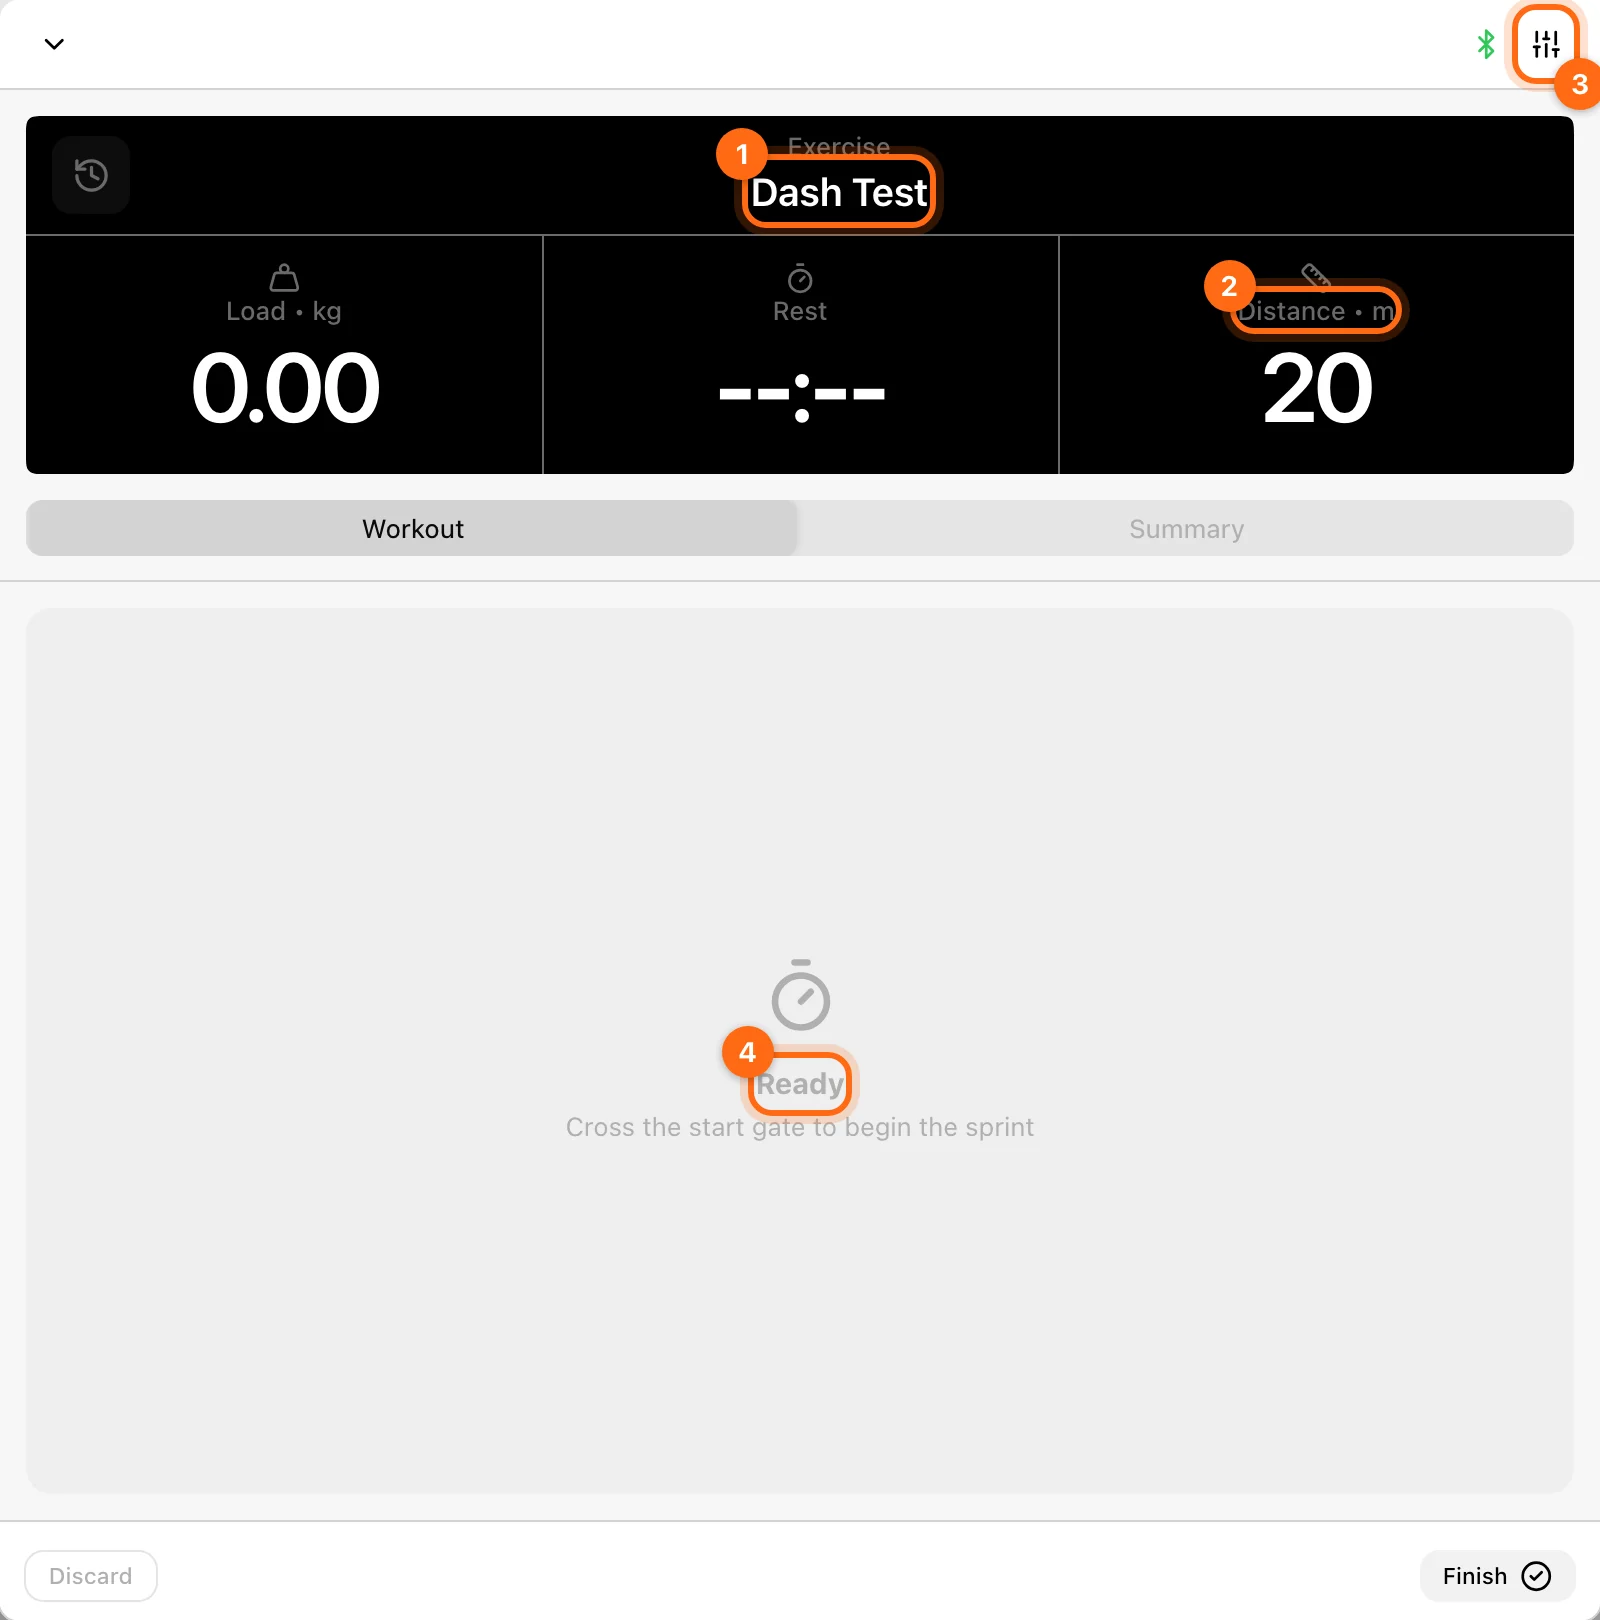
1. Check the athlete, device, and exercise
Select the organization and active athlete. Connect the Speed device and mark it active in its family. Choose the sprint Exercise in the header. The focused exercise picker is sprint-specific.
An active encoder can coexist with the Speed device, but it cannot supply sprint start/split events.
2. Match the app to the course
Open sprint Settings or the Distance card’s setup. Review the available connected gate topology and its distance rows:
- Multiple-gate rows name intervals such as Gate 1 → Gate 2.
- One-gate multi-pass setups use Split distances for repeated passes.
- Disconnected means the configured segment cannot be timed with the available gates. The row checkbox is an indicator, not a hardware-connect button.
Enter each segment’s length in the shown m or yd unit. A course with three ten-metre segments uses 10, 10, 10, not cumulative 10, 20, 30. Check the total Distance shown for the usable course.
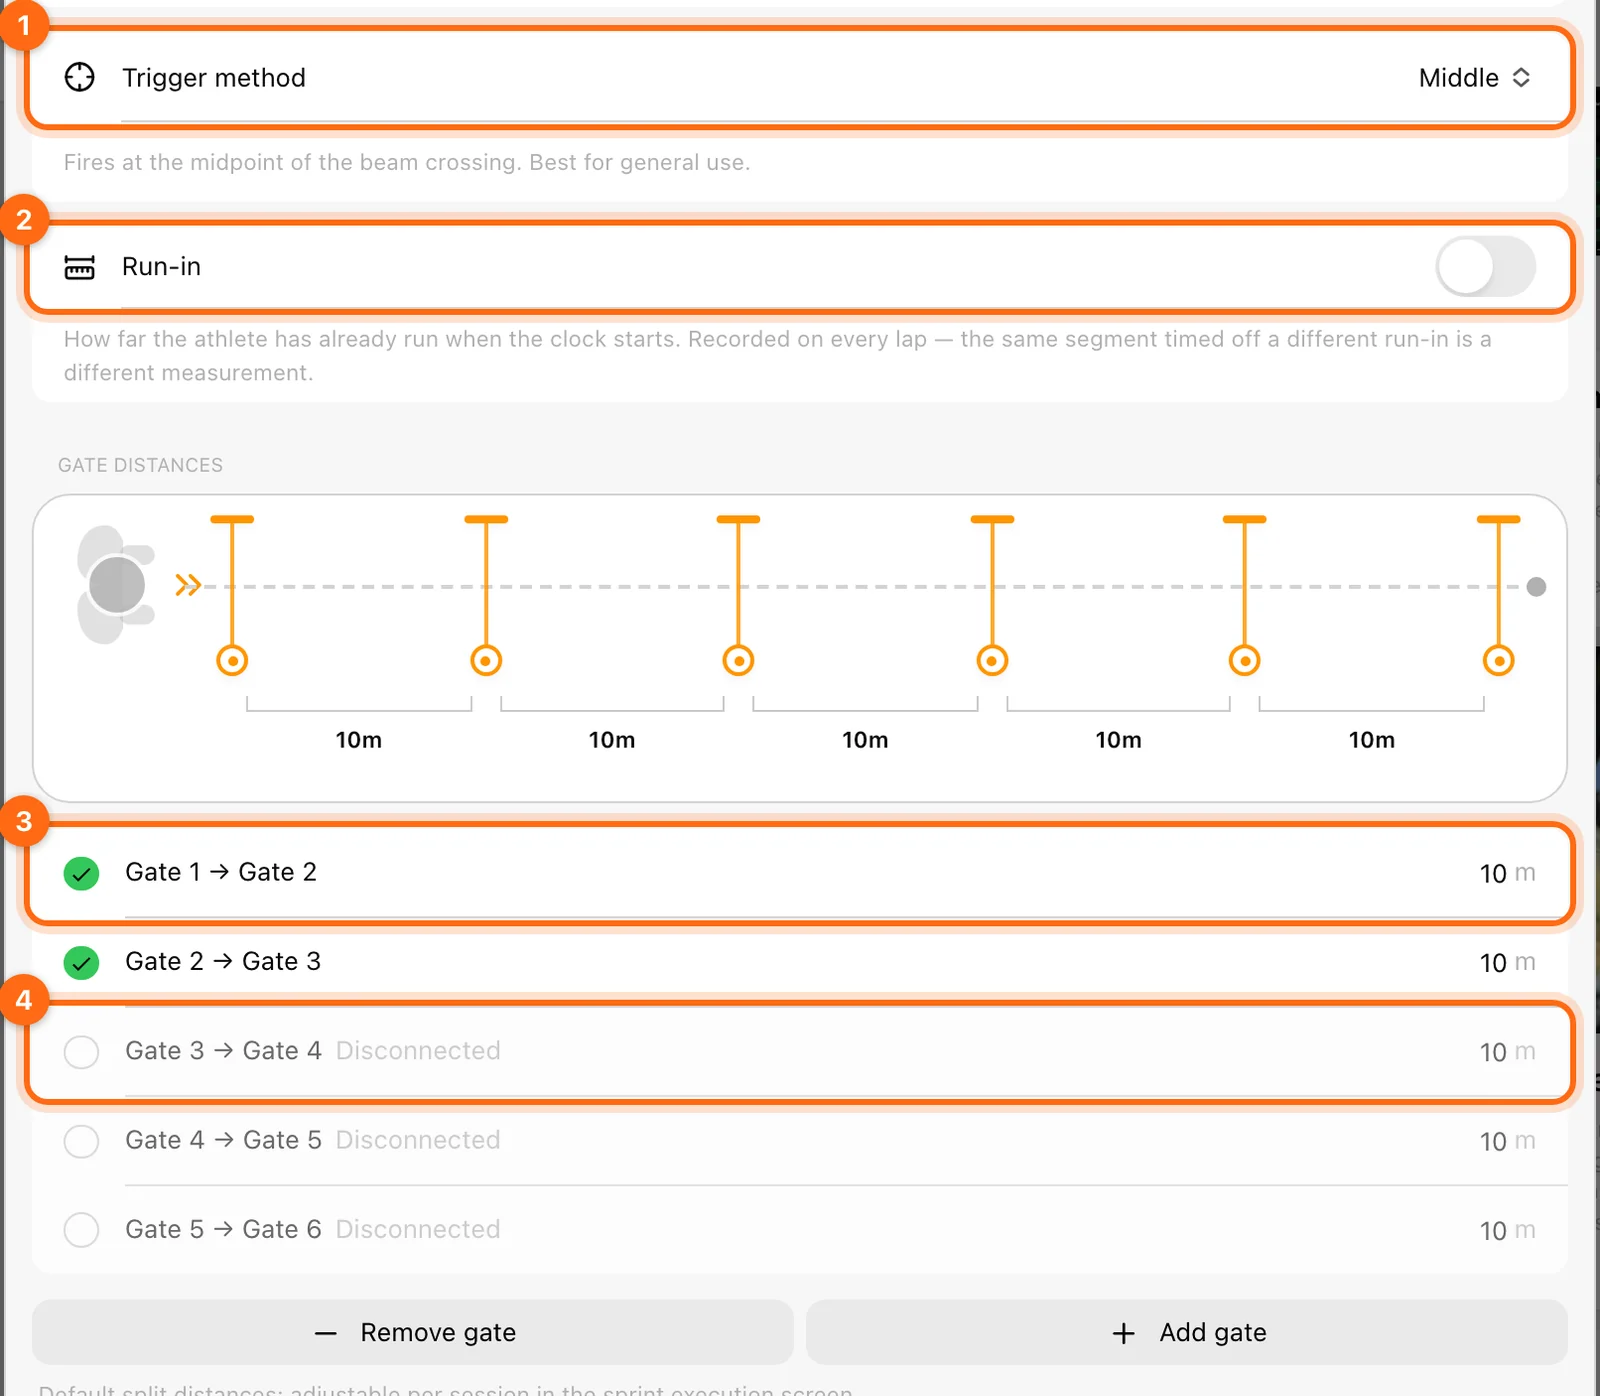
3. Choose the trigger and run-in
| Trigger | Timing event | Run-in behavior |
|---|---|---|
| Middle | Midpoint of the beam crossing. | Run-in can describe the distance before the first gate. |
| In Beam | Athlete leaves the beam. | Run-in is zero and its control is not offered. |
Use the trigger appropriate to the intended start and keep it consistent across comparisons. Changing it changes the recorded event, not just a display preference.
4. Set the external Load
Load means added load, such as a sled or vest. Use 0 for an unloaded run. It is not the athlete’s body weight.
5. Begin from the device
There is no separate Start button in the focused sprint workout. Once its exercise, usable course, and compatible hardware are ready, the app listens for the device’s start event.
Cross or leave the start beam according to the configured trigger. The live run display opens and records laps/splits. A display waiting for Cross the start gate to begin, like the workout's Ready message, means no valid run has been timed yet.
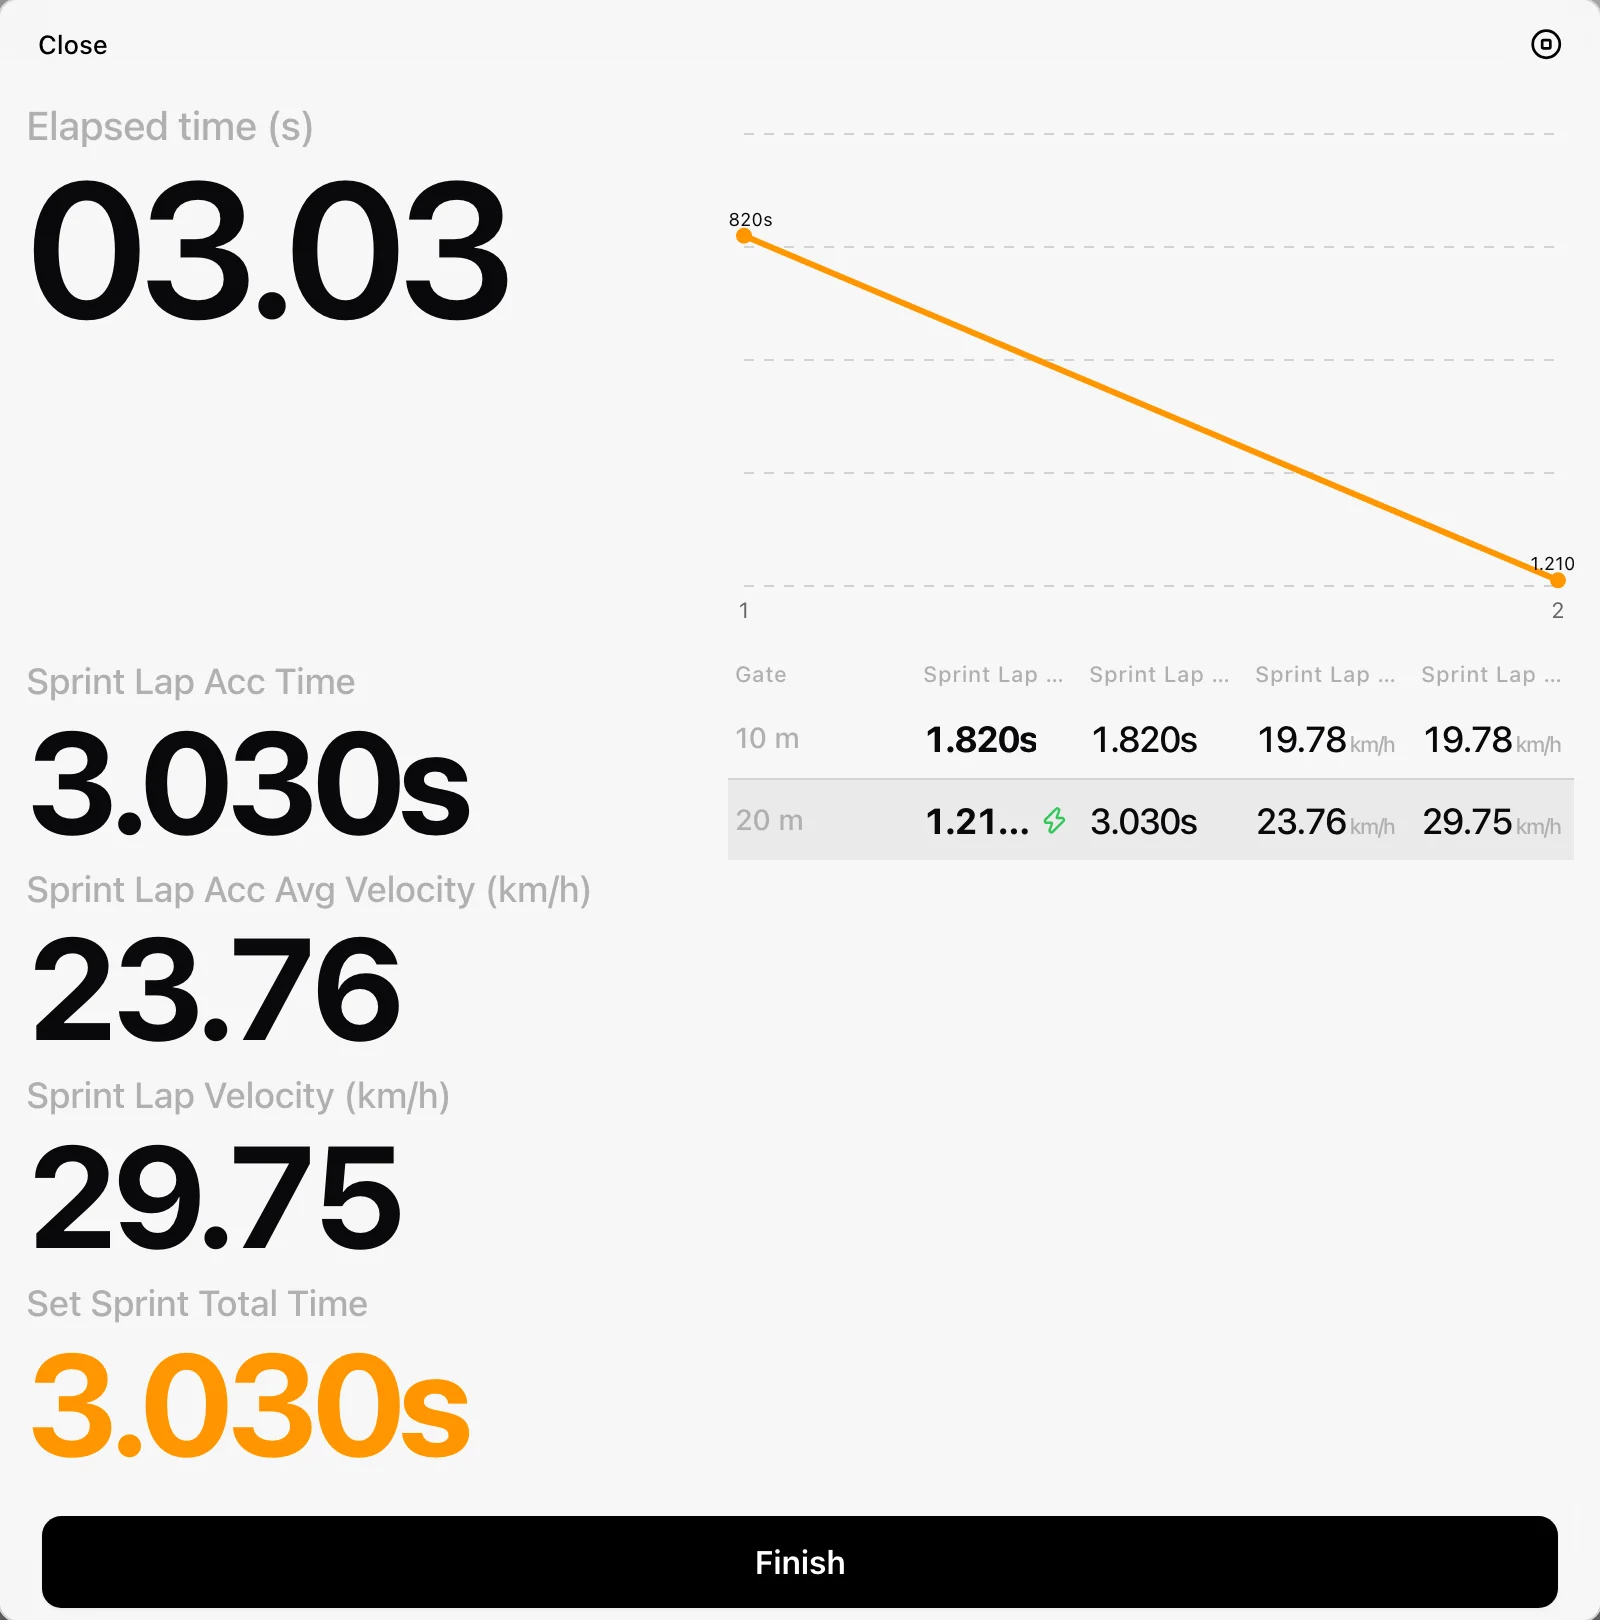
Do not change athlete, course, or load during the run. Settings are protected while the display is recording.
6. Finish or resolve the run
Cross the intended finish event, then finish/save the run through the display’s controls or the configured automatic set-ending behavior. Reaching the finish gate and finishing the entire workout are separate actions.
If you leave early, Stop sprint can say the run did not cross the finish gate and offer Save, Discard, or Cancel for the recorded laps. Save partial data only when that is the record you intend to keep; do not compare it as if the full course was completed.
The live sprint board can remain up across another device start event. In that case it commits the previous captured run and starts the next one. Check the set list afterward rather than assuming an open board means no run has been saved.
7. Read the run results
Expand a set for the split chart and available lap rows:
- Lap time: that segment’s duration.
- Cumulative time: elapsed time through that point.
- Speed: calculated with the recorded distance context.
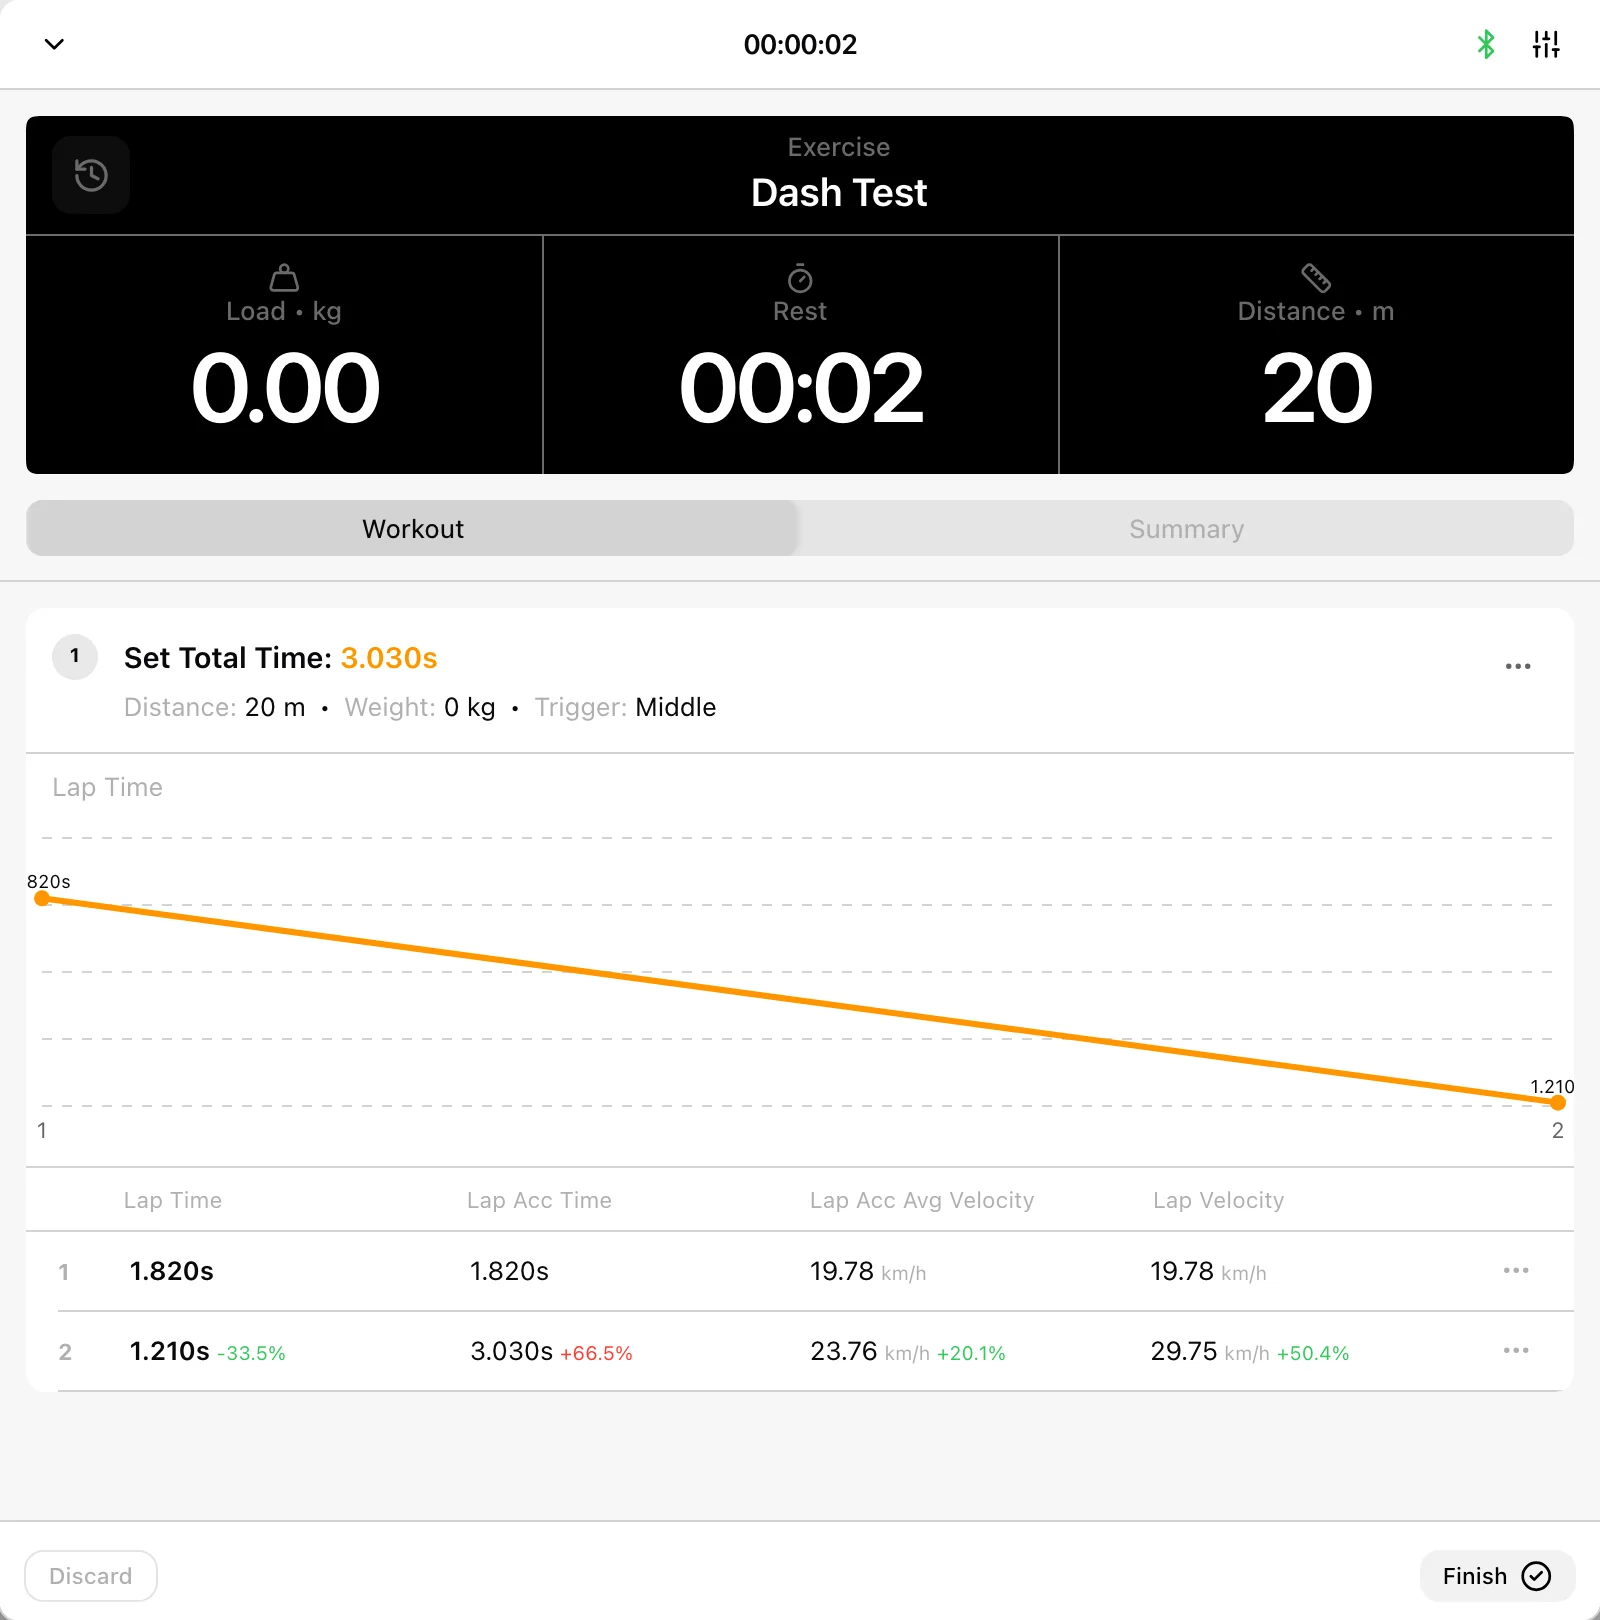
Wrong distance input can produce plausible timing with incorrect speed. Compare the same exercise, course, trigger, distance units, and external load when reviewing progress.
8. Finish the sprint workout
Use Summary for Name/RPE and the whole workout’s run overview. Select the footer Finish, choose the athlete scope in Coach Mode, and confirm. Allow upload and review the sprint workout in History.
If no run records
Check exercise selection, active Speed device, available segment count, distances, and whether a start event actually occurred. A row marked Disconnected needs hardware/topology correction rather than another entered distance. Preserve partial laps if a link drops and follow Connection troubleshooting.
Record jump workouts
Use Vertical Jump, RSI Modified, or 10/5 Jump RSI; configure athlete inputs, wait through calibration, and save the recorded workout.
Record reaction workouts
Choose Light Chase, Go/No-Go, or Choice, configure duration and difficulty, record events, and review both response timing and accuracy.