Add, invite, and manage athletes
Choose the right athlete-onboarding method, import a roster, manage invitations, and understand Delete versus Remove.
Open Management → Athletes in Coach Mode. On web, Athletes is in the left sidebar's Management group. On mobile, tap More (the three-dot icon at the bottom right) and open Athletes in the management area. From there you can create, edit, import, invite, and delete athletes.
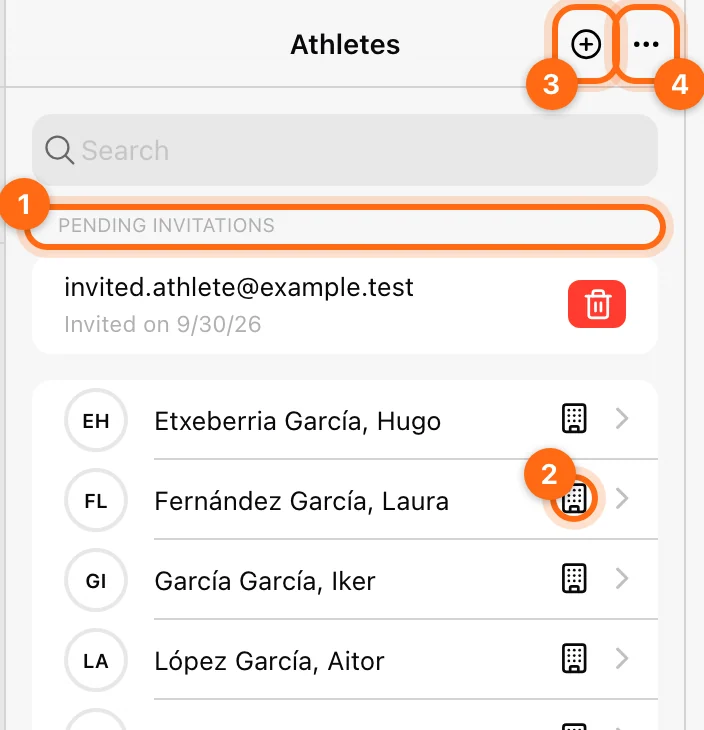
Athlete management requires a team plan. Owners and Coaches can use it; the organization's plan and your coach assignments determine the roster you can manage. Lite plans can add up to 15 athletes; Basic, Elite, and Professional plans allow a much larger roster. If + or the ⋯ options are missing, see Plan and access.
Choose Create or Invite
| You need… | Choose… |
|---|---|
| A profile for supervised training on a coach’s device | + → Create Athlete |
| An athlete who can sign in and use the app independently | ⋯ → Invite |
| Login access for an existing coach-created profile | Send Invitation Email from that profile |
| Many people to join using their own accounts | ⋯ → Bulk Invite (QR) |
| Many coach-managed profiles from an existing list | ⋯ → Import |
Entering an email during Create Athlete does not itself send an invitation or create a password.
Create a coach-managed profile
- Select + in the top-right corner.
- Enter Name and Last name. Both are required; Save stays unavailable until they are filled.
- Optionally choose Gender.
- Add an Email if you intend to invite the athlete later. It is optional.
- Select Save.
- Open the profile to check it, then add the athlete to a team if needed.
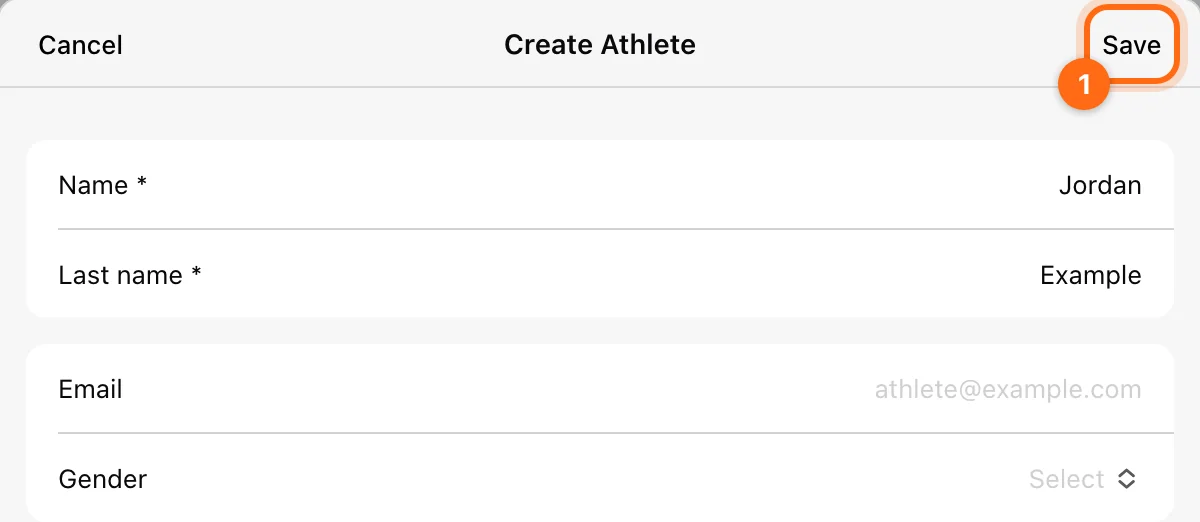
This creates an unregistered athlete: a profile that exists only inside your organization and trains through your supervision. Unregistered profiles suit in-gym and supervised training, such as schools, colleges, and teams where athletes do not use their own phones.
In the roster, an unregistered athlete shows a building (organization) icon next to their name. The athlete stays unregistered even if you add an email, until they accept an invitation. Do not share a coach’s login to give them independent access; send an invitation instead.
Invite by email
- Open ⋯ → Invite.
- In Invite Athletes, enter one address, or several separated by commas, for example
email1@example.com, email2@example.com. - Select Invite.
- Look for Invitations sent successfully. If some addresses fail, the app reports how many invitations had errors; correct those addresses and send them again.
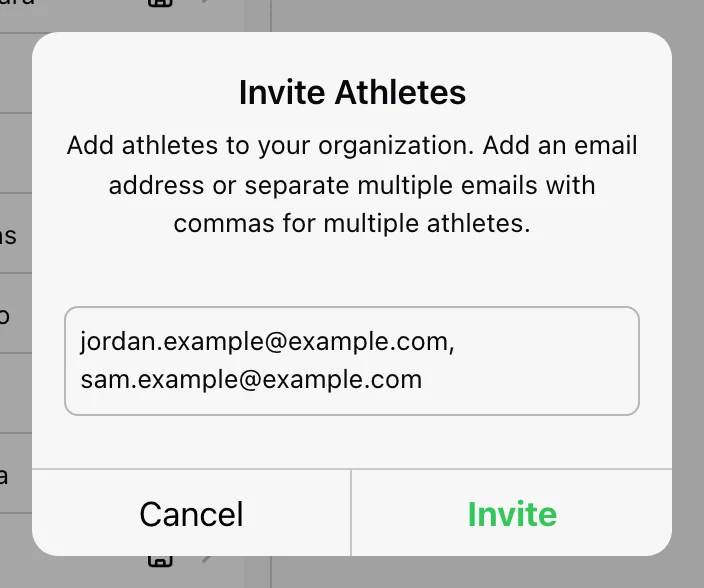
The athlete receives an email and accepts using the invited address, then becomes a registered athlete who trains with their own Vitruve account. You keep seeing their recorded data in your organization, which suits remote coaching.
Unsent requests appear briefly under Pending invitation requests. Sent invitations that have not been accepted appear under Pending invitations at the top of the roster with their Invited on date. To withdraw one, select its delete (trash) control and confirm; this cannot be undone, so send a new invitation if you change your mind. There is no separate resend control: delete the old invitation and invite the address again if the email was lost.
Invite an existing profile
If a coach-created profile already has an email, open the athlete and select Send Invitation Email under Invite Athlete. Confirm Send Invitation for the displayed address. An invitation email is sent automatically, giving the athlete access to log in to your organization.
Use this instead of a new email invitation, so the athlete keeps the existing profile and history rather than becoming a duplicate. The control appears only for profiles that do not yet have their own account and have an email saved.
Use a QR invitation
Open ⋯ → Bulk Invite (QR). It generates a QR code that athletes scan to join your organization instantly with their own accounts.
- Set Max athletes: how many people can join with this code. The default is 200, and the value can range from 1 to 1,000.
- Choose Expires in: 6 hours, 12 hours, 24 hours (default), 48 hours, or 7 days.
- Select Generate QR Code.
- Show the code on screen (use Fullscreen for a group) or share it with Copy Link.
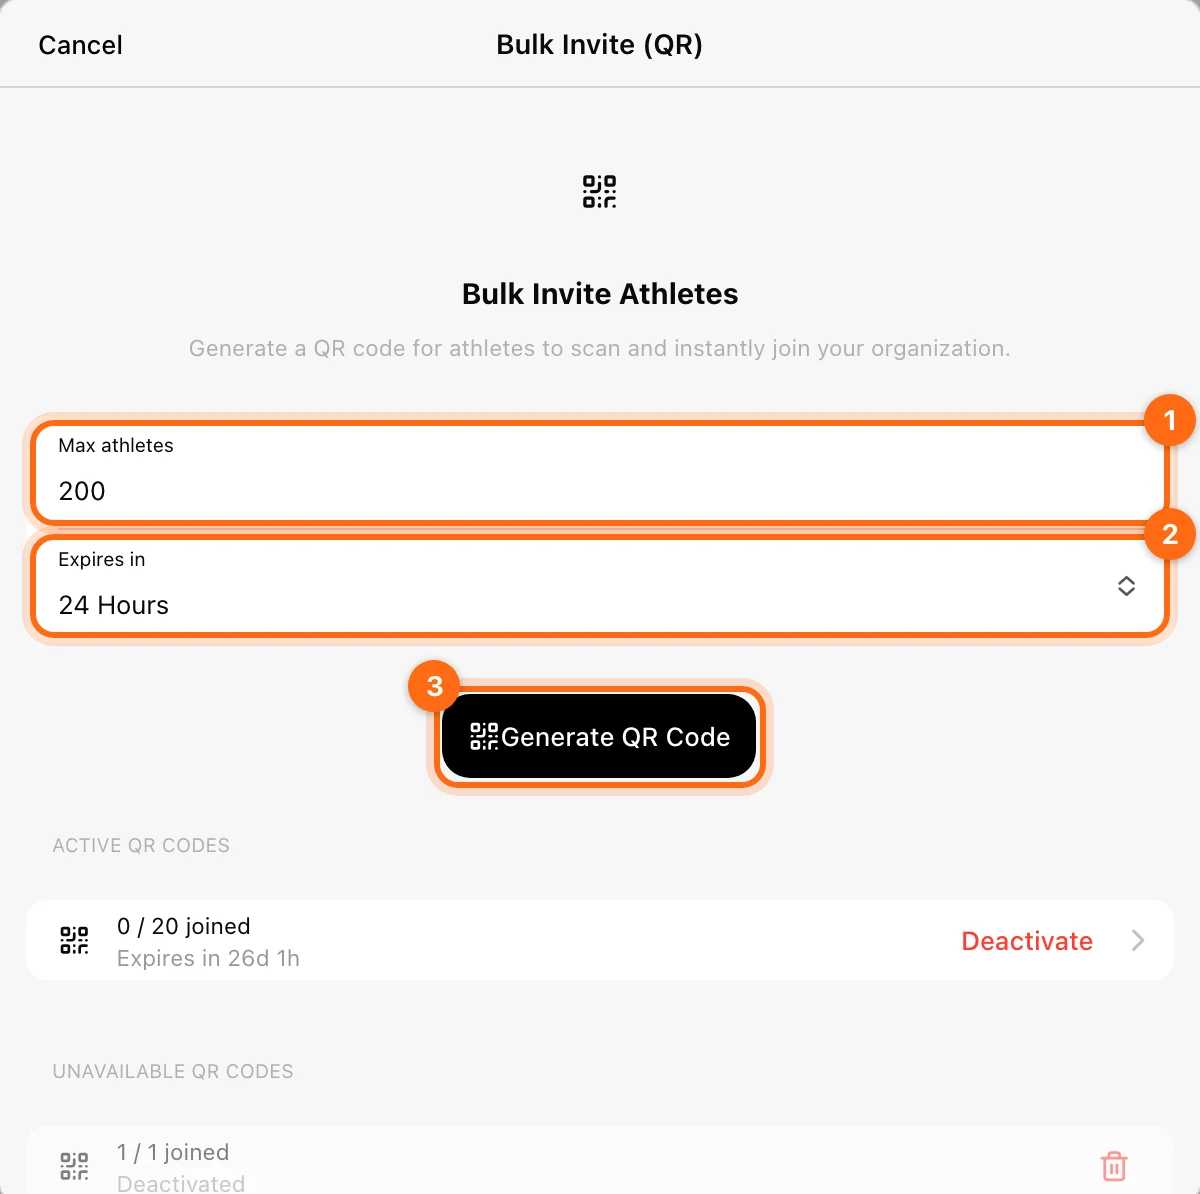
The code view shows the remaining time and the join count (for example, 12 / 200 joined). Active QR Codes lists codes still usable; Unavailable QR Codes lists codes that are Expired, Full, or deactivated. Select Deactivate to stop a code early.
If joining stops working, check whether the code expired, reached its limit, or was deactivated. Generate a new code when appropriate rather than asking every athlete to try the same inactive link again.
Import a roster
Open ⋯ → Import and paste your athletes’ information. Any format is accepted: CSV, spreadsheet cells copied from Excel or Google Sheets, or plain-text descriptions. You do not need to reformat the document; the app’s AI parser detects the fields and creates profiles asynchronously.
- Include as much useful information as possible, such as name, email, and gender.
- The paste box accepts up to 15,000 characters; the counter shows how many remain. Split a very large roster into several imports.
- After you start, Import Started confirms that the athletes are being processed. You receive an email notification when the import is complete.
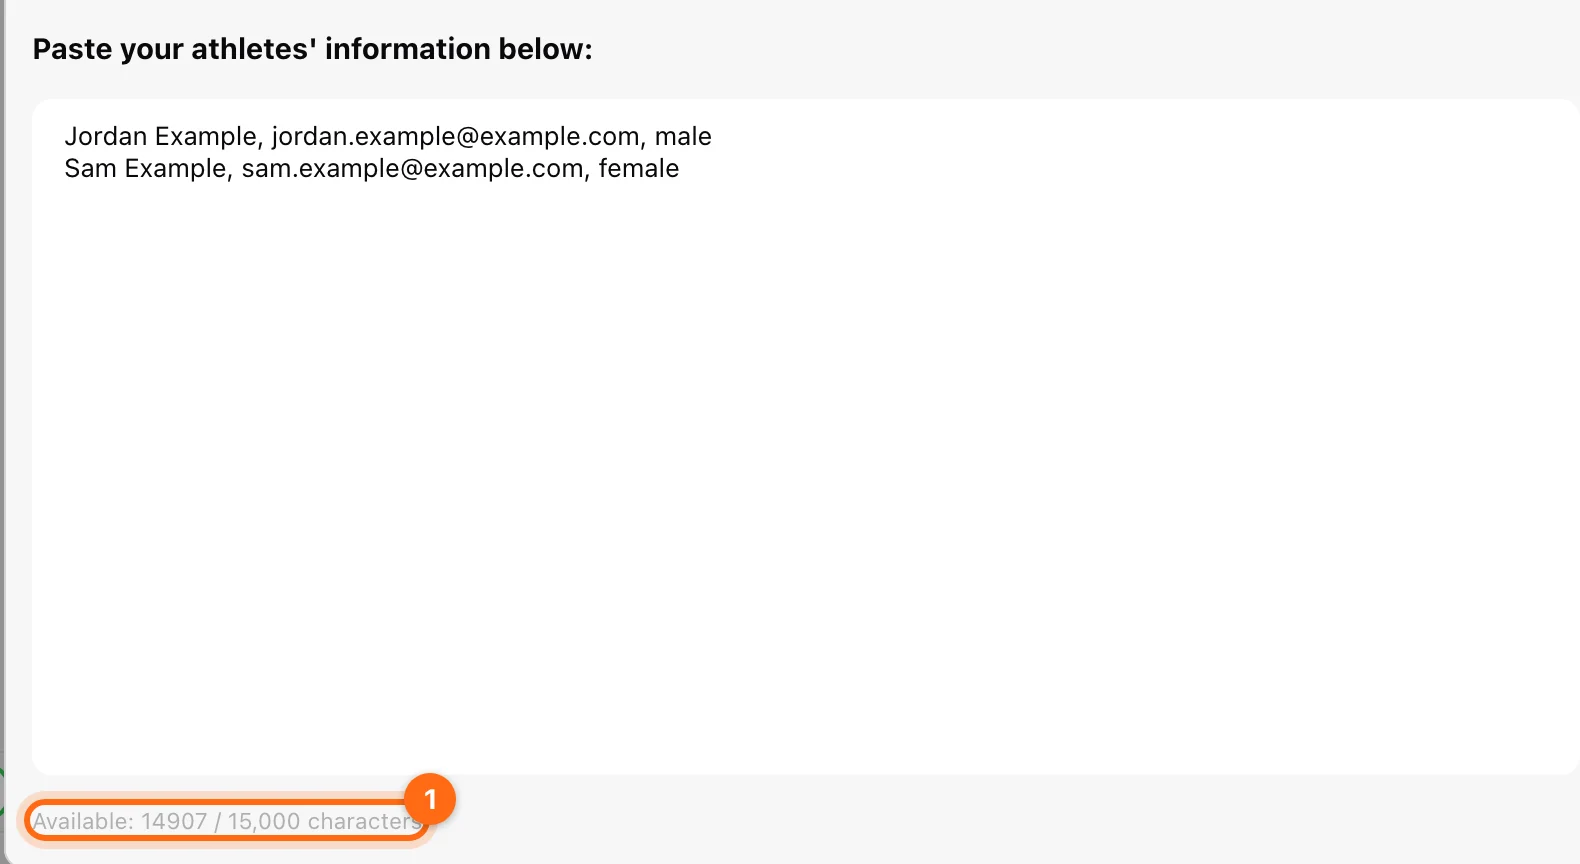
Before importing:
- Check for existing athlete profiles.
- Include clear names and accurate emails.
- Avoid pasting unrelated notes or sensitive information the profile does not need.
After completion, inspect the roster for duplicate names or incorrect field mapping. An import creates unregistered profiles; it is not the same as athletes accepting invitations. If Import Error appears, check the pasted content and try again.
Edit the profile
- Select the athlete’s name.
- Change the editable fields, such as Name, Last name, Email, Gender, and avatar.
- Select Save.
Coach-managed profiles have editable identity fields. Registered athletes own their personal account details, so those fields are read-only to coaches. For a registered athlete, Birth date and Dominant side are managed by the athlete in their own account; on a coach-managed profile you can set them here.
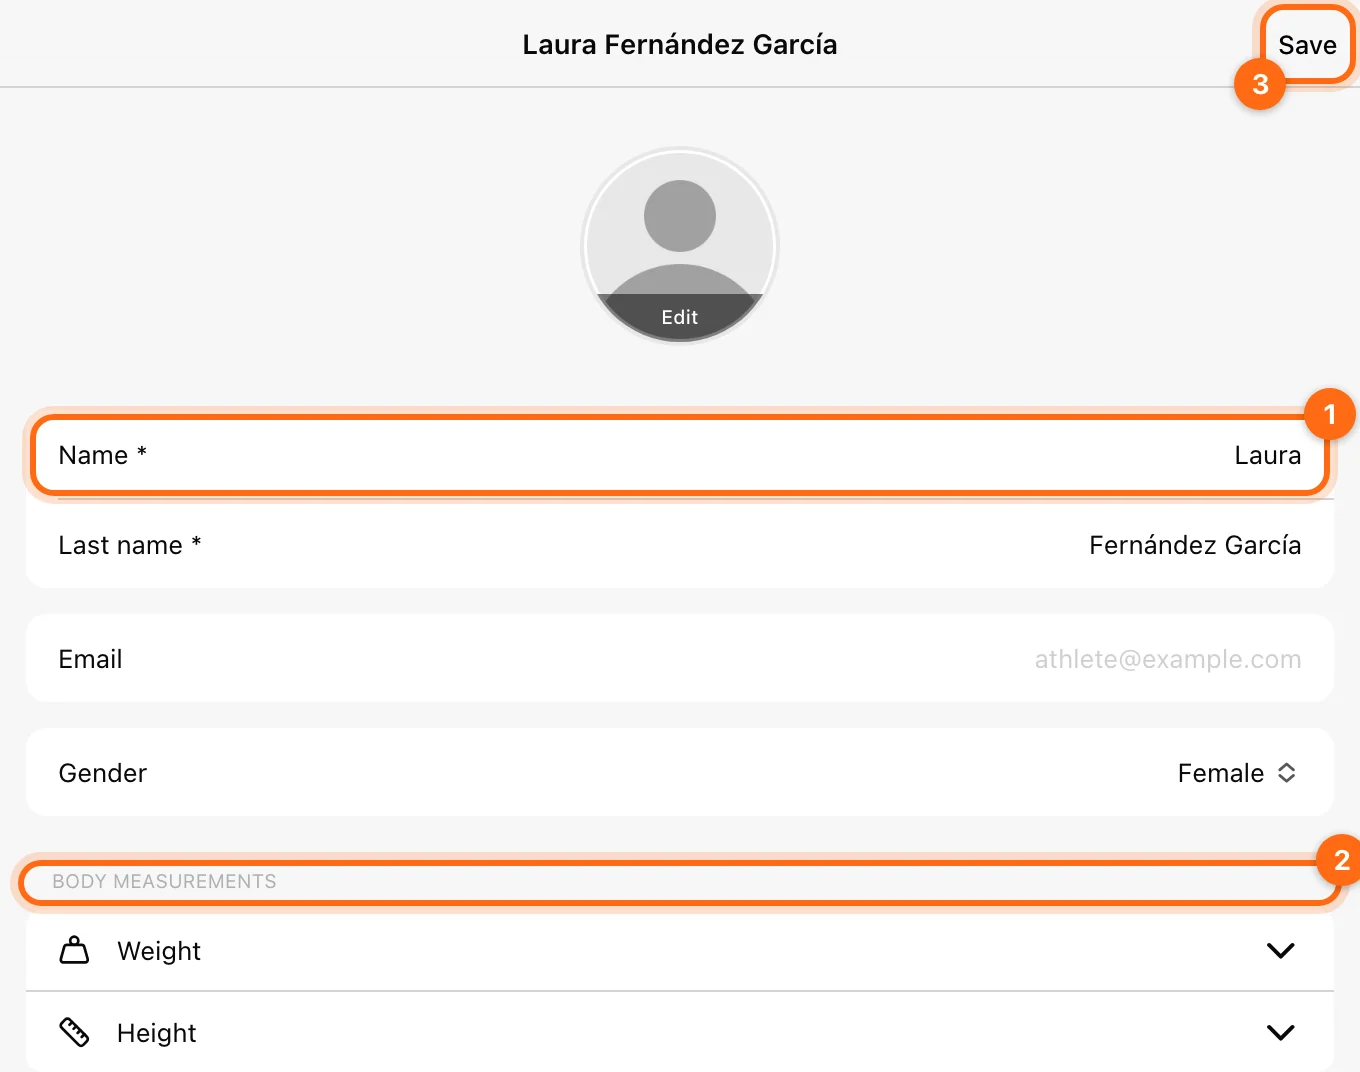
Open an athlete to see their profile and Body Measurements. Body Measurements records weight and height. To set a manual 1RM or a load–velocity profile, use Training settings and equations, not body measurements.
Assigned coaches shown on the athlete profile are informational; the Owner manages those assignments from the coach’s profile. “No coaches assigned to this athlete yet” means no explicit assignment exists; see coach visibility.
Delete versus Remove
The bottom of the athlete’s profile shows the action that applies to that athlete:
- Unregistered athlete → Delete: permanently deletes all data associated with the athlete, including their profile, measurements, and training history. This cannot be undone.
- Registered athlete → Remove from organization: ends membership. The athlete’s personal account remains active, and they can be added back to the organization later.
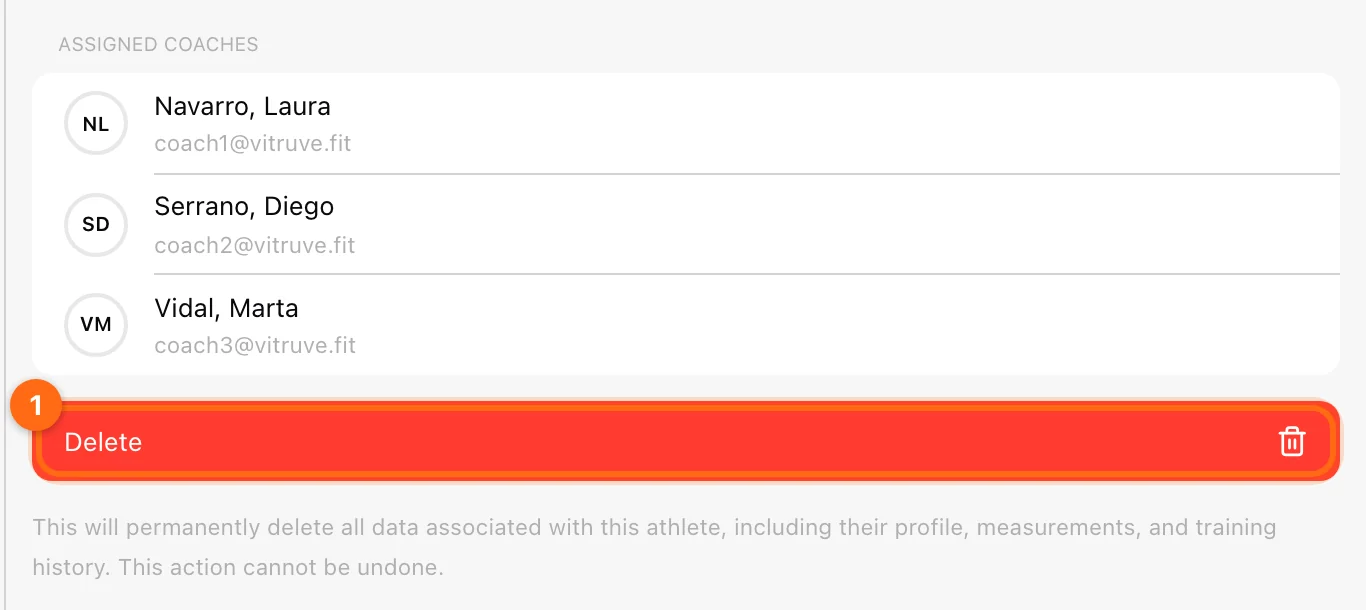
Delete several athletes
- Open ⋯ → Delete on the roster.
- Select the athletes, or use Select all / Unselect all in the footer.
- Select Delete in the header.
- Review the names in Delete Athletes and confirm.
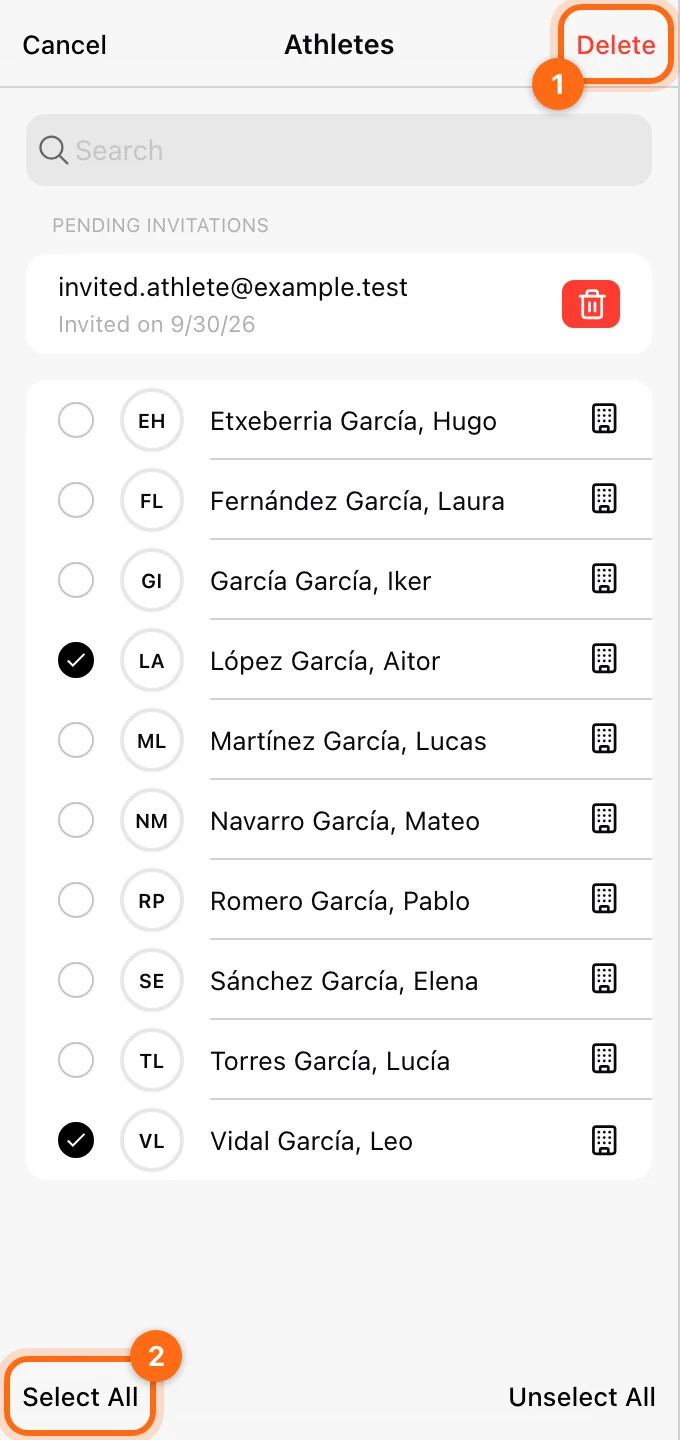
Select Cancel to leave selection mode without deleting. Deleting a team is a different action and does not delete its athletes. Review the confirmation and athlete’s registration state before using a destructive action.
If you cannot find an athlete
Check Coach Mode, organization, roster search, team filter, and your assigned-athlete access. Ask the Owner to check your coach assignments before creating another profile. See Missing features or athletes.