Set up your first coached session
A practical setup sequence for your organization, roster, program, and first multi-athlete training session.
By the end: your athletes will be in the correct organization, a dated plan will be available to them, and you will know how to save and review their sessions.
Before you begin
You need the Owner or Coach role in the organization and a team plan that includes Coach Mode. If you are setting up a new organization, choose Team during setup. If someone invited you as a coach, accept that invitation and select their organization.
1. Establish the organization defaults
The Owner opens Organization to set its name, category, and Metric System. Decide whether the group uses kilograms or pounds before prescribing loads. Each person can have a personal unit override, so a different display does not necessarily mean the underlying data is different.
Open Settings → Training to set feedback, rest, and default prescriptions. Use Cloud shares these settings with other devices that also have it enabled. Leave it off for a device-specific setup.
2. Turn on Coach Mode and add athletes
Enable Coach Mode in the web sidebar footer or on More in the installed app. Then open Athletes.
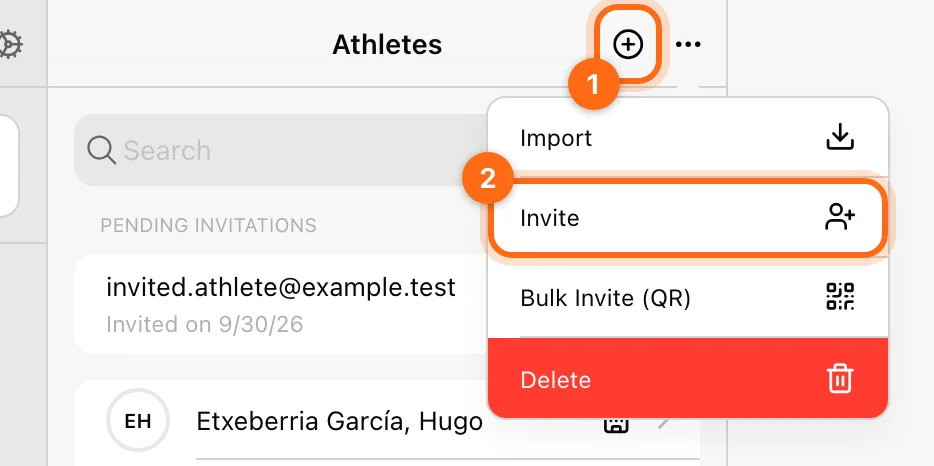
- Use +, which opens Create Athlete, for a profile you will manage on a shared training device. This does not send an email or create a login.
- Use ⋯ → Invite if the athlete should sign in and train independently.
- For a large group, use the import or QR invitation workflow in Add and invite athletes.
Create a Team to make selection easier. A team is a grouping of existing athletes; it is not a new organization.
3. Build one usable workout
On web, open Builder → Templates → Workouts. Create a named workout, add blocks and exercises, and fill the set prescription table. Use a small, complete session for your first setup so you can check the full flow.
For example: a warm-up block, one main-lift block, and an accessory block. Add Reps, Weight or % 1RM, and Set Rest as appropriate. For VBT work, use the actual MPV, MV, PV, and Fatigue parameters described in Prescribe sets.
4. Put the workout on the calendar
Add the workout to a phase and place that phase in a program. Then create a Live Program, load the structure you want to use, and set its start date to a Monday.
Open its athlete selector, filter to your team if useful, and choose the athletes. Confirm the dated session in Calendar for at least one assigned athlete. A saved template by itself does not assign anything.
See Assign and manage live programs for the complete workflow.
5. Run and save the session
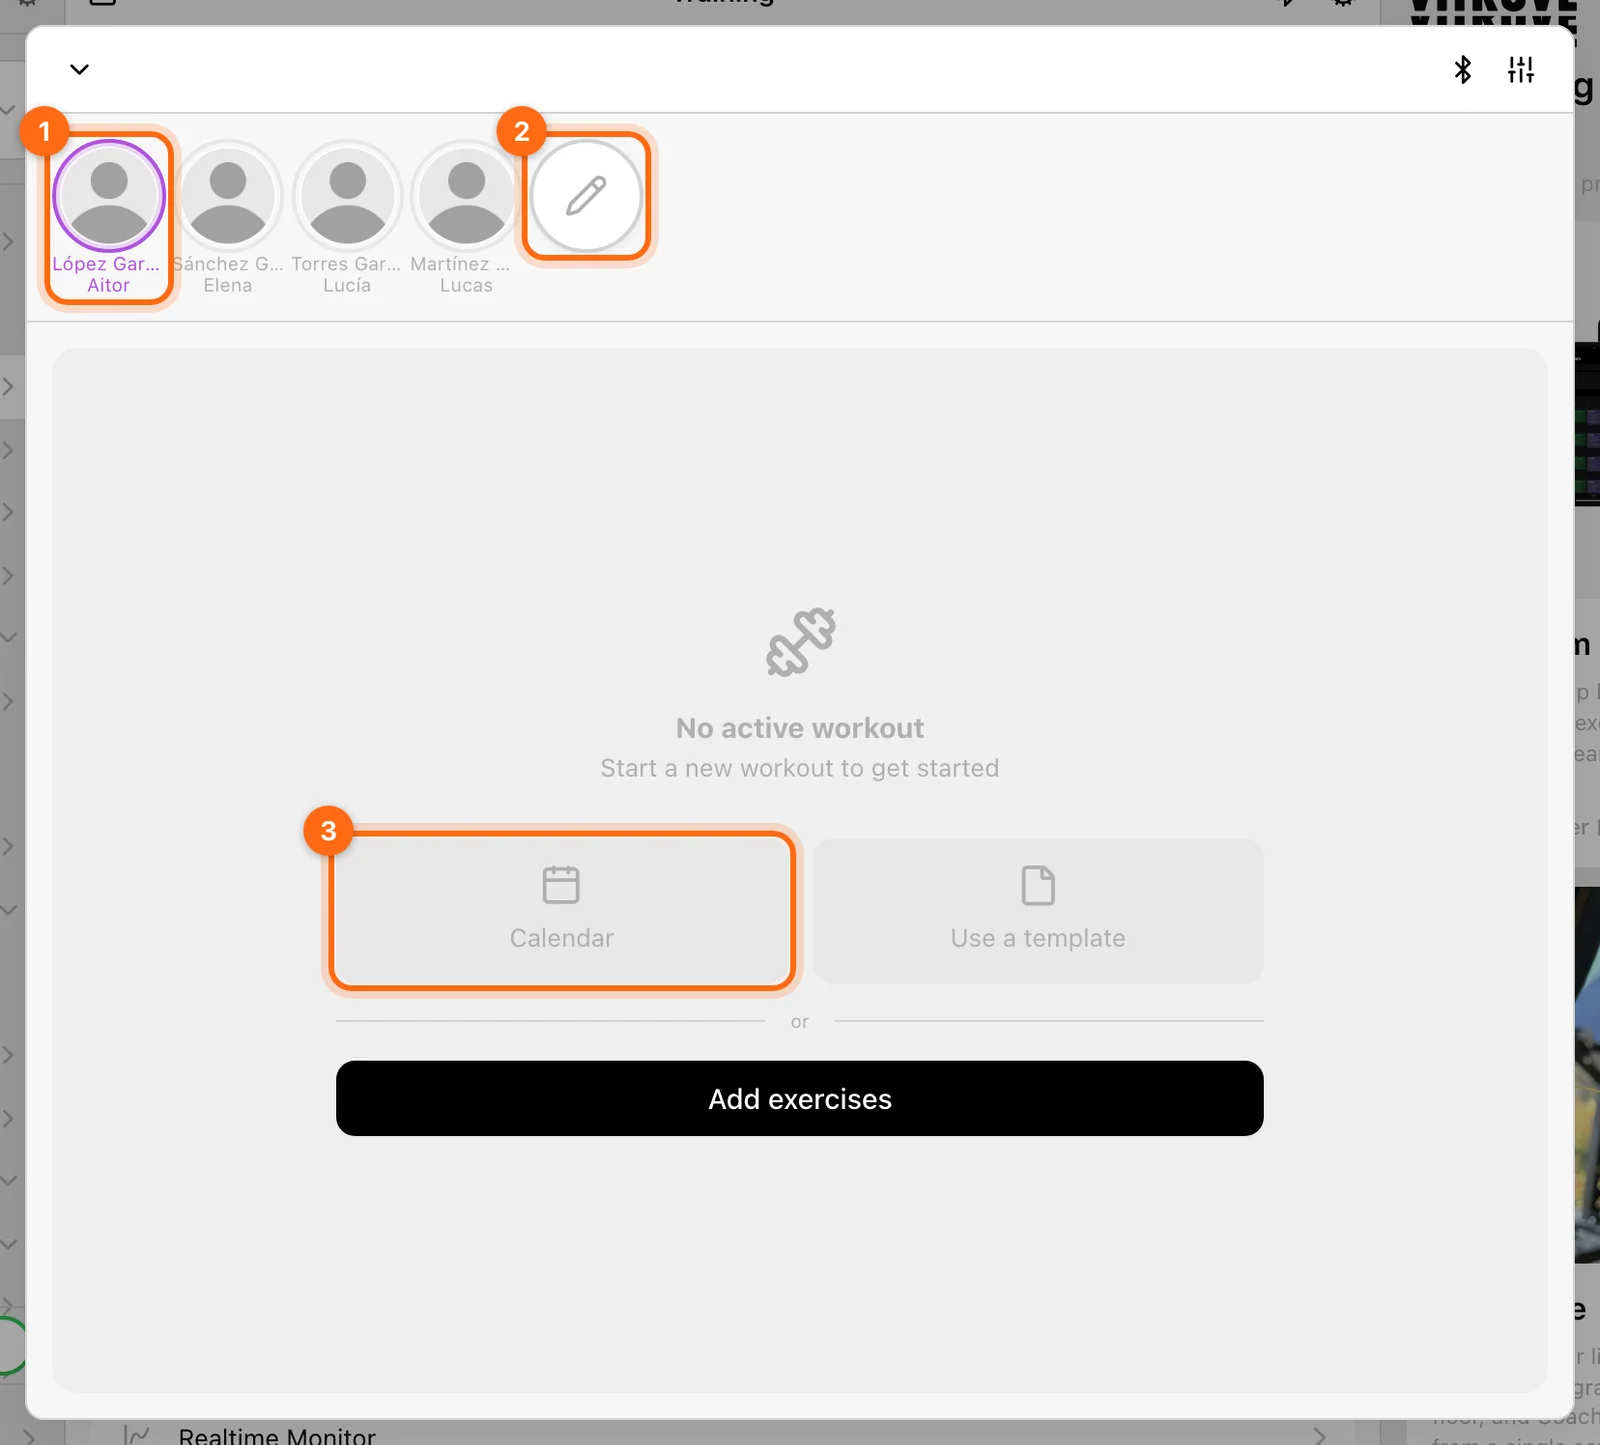
- Open Training and use the athlete strip’s pencil to select the session roster.
- Tap the avatar of the athlete who is performing the next set.
- Open Workout → Calendar and choose the scheduled session.
- For measured work, connect the device and verify exercise, load, and active athlete before each set.
- Finish the workouts you want to keep. In a recording workflow, use the footer’s Finish → Only this athlete / All athletes, review the scope, and confirm. Coach Live has its own Finish all for its monitoring selection.
- Check History with the same athletes selected.
Check your setup
- The athlete appears in Athletes, not only in a pending invitation.
- The live program has the intended Monday start and athlete assignments.
- The athlete can see the expected calendar session.
- A recorded workout appears in History after finishing and uploading.
- Any pending upload has completed on the recording device.
Next steps
Continue with Coaching several athletes, Coaching staff access, and Reviewing results.