Record a VBT workout
Choose your lift and load, capture encoder sets, understand the live and set displays, pause recording, and finish the workout.
Use Training → VBT for an on-the-fly lifting workout recorded with an encoder. If you want to perform a calendar prescription or combine different modalities in one planned session, use Training → Workout.
1. Check the athlete and encoder
If you belong to several organizations, switch to the one where this training should be saved before you start. Then choose Coach Mode to record other athletes, or stay in personal mode to record yourself. See Organizations and Coach Mode.
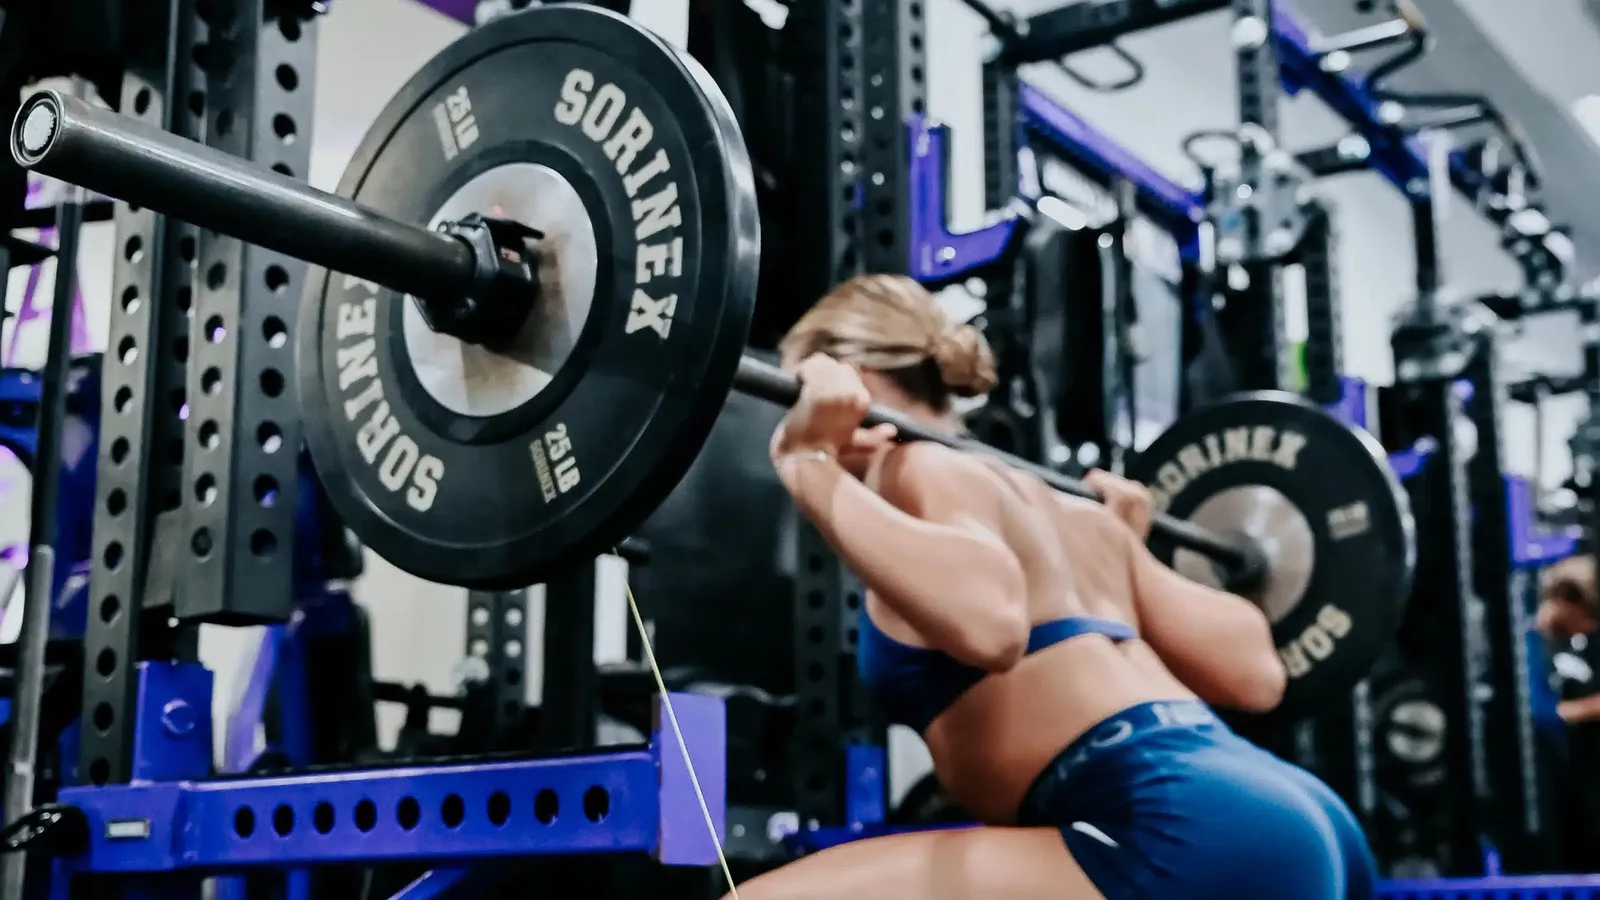
Set up the encoder on the rack before connecting it. Place it on a stable metal surface, such as the squat rack or platform, using its magnetic base. Pull out the cable and attach it to the barbell with the strap. See Encoder connection and placement for where to place it.
In Coach Mode, use the athlete strip's pencil to choose who trains in this session, one by one or by team. Then select the avatar of the athlete lifting next. The pencil also adds or removes athletes during the session.
Choose the correct organization and active athlete. Open Bluetooth, connect the encoder, and check that it is the active encoder. The app can keep a separate timing-gate device active at the same time; connecting it does not make it the source of velocity reps.
An equation is not required to measure velocity. It supports the exercise’s estimated-1RM/load workflow when configured and permitted.
2. Choose the exercise and actual load
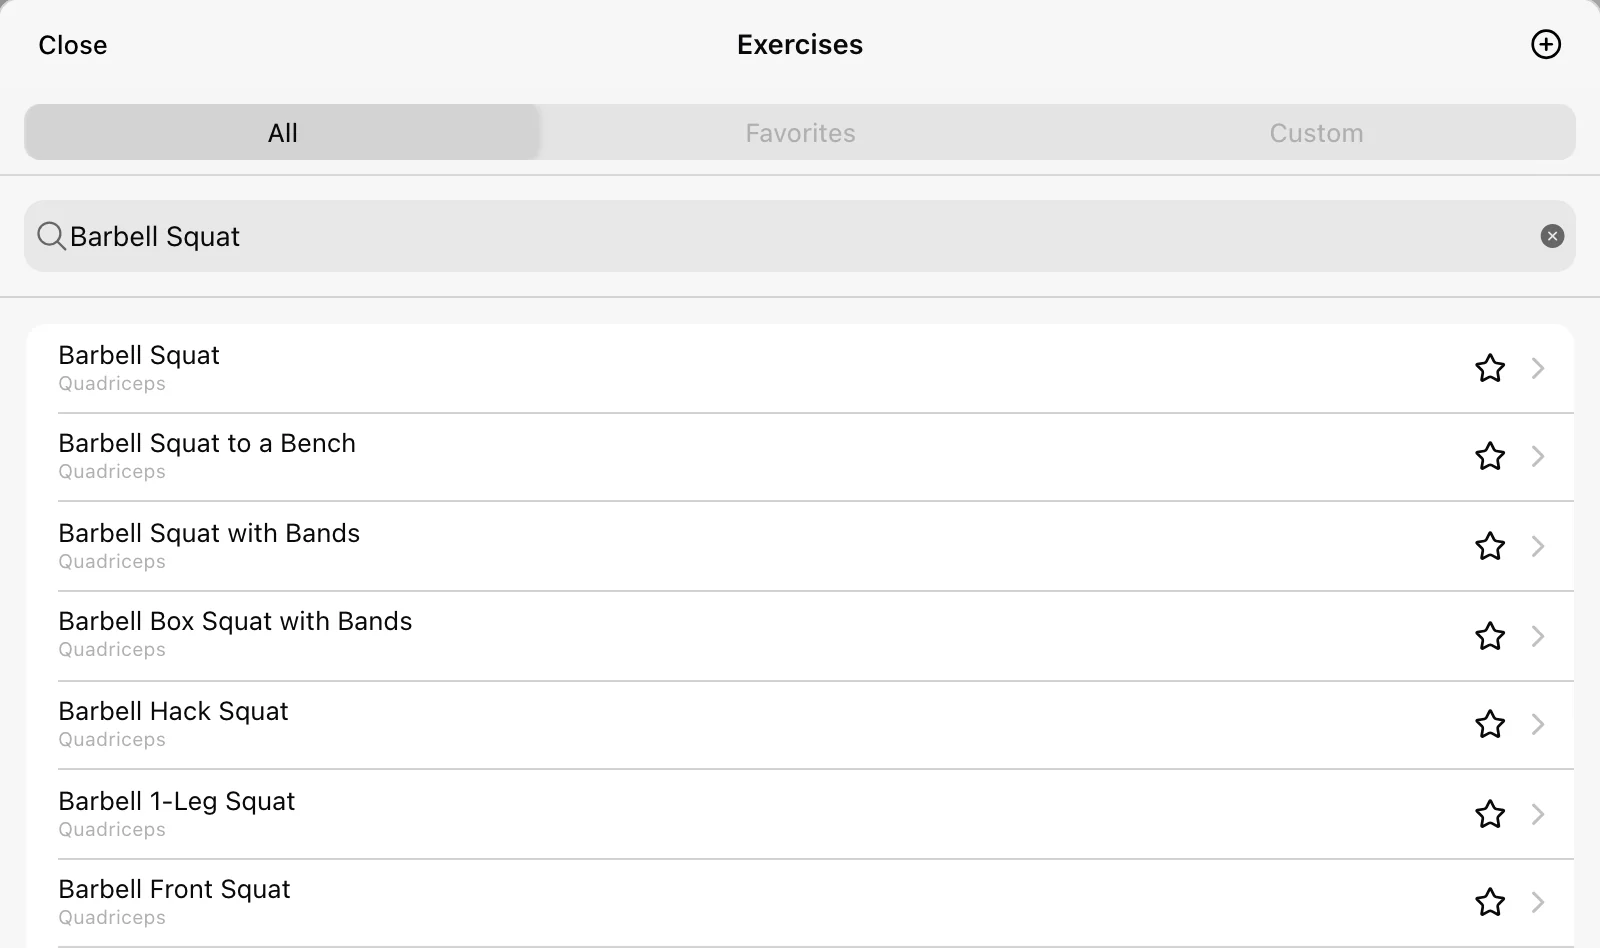
Select Exercise in the header and choose the exact lift variation. The focused VBT flow starts from this selector, not from Calendar or a workout-template chooser.
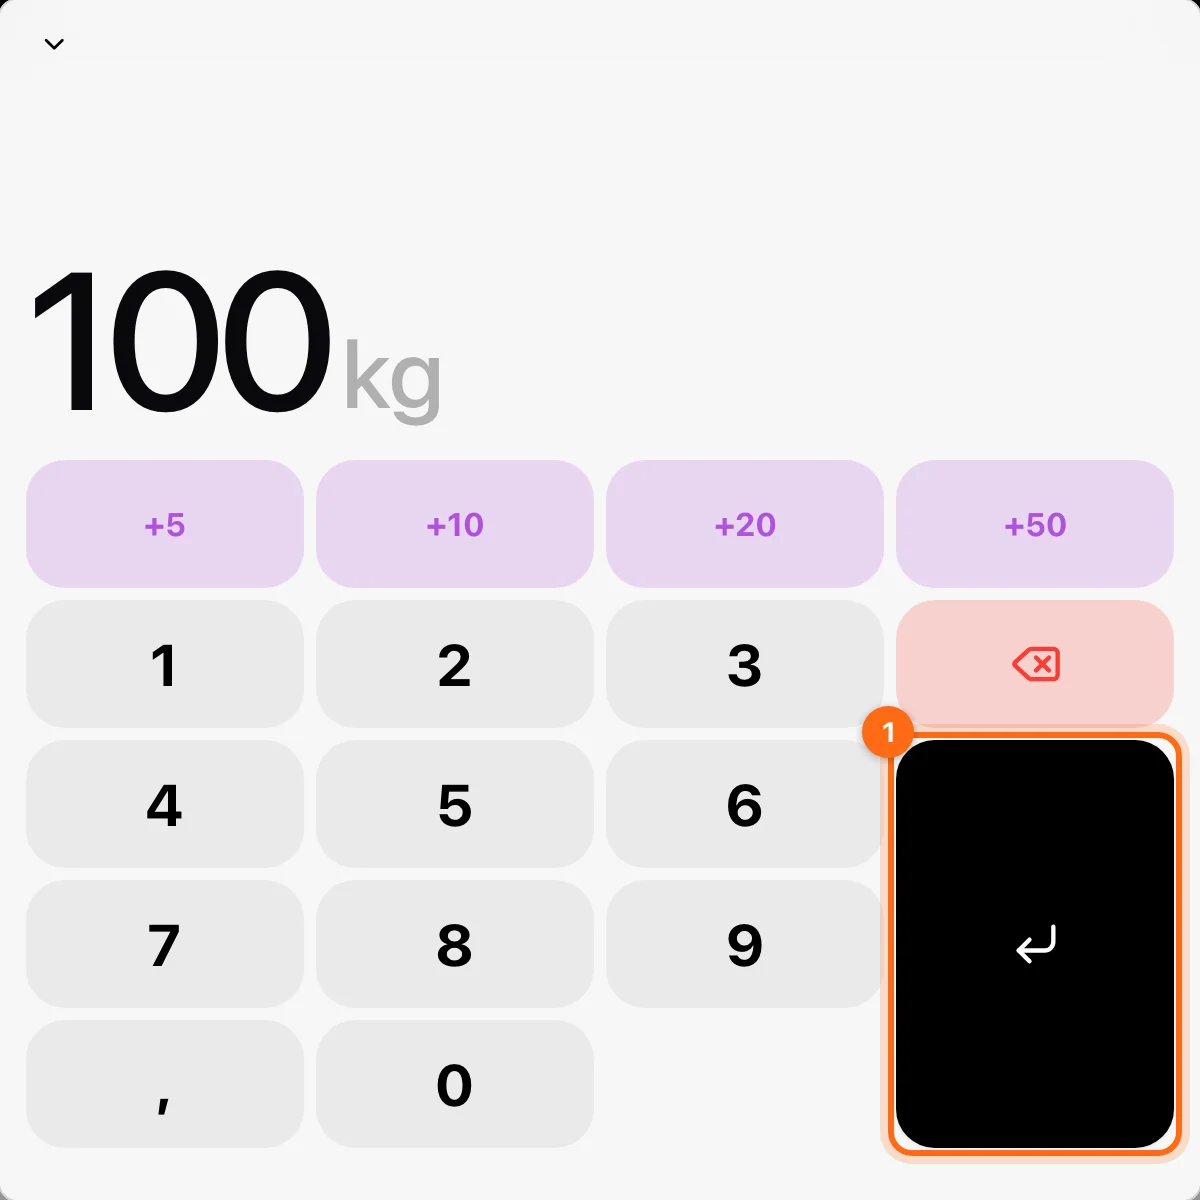
Select Load and enter the weight you are actually lifting in the displayed kg/lb unit. The screen may retain a previous load; do not treat that as the next athlete’s prescribed weight. A missing/zero load can prevent this VBT recording flow from becoming ready.
The History control beside the exercise opens its Progress view for the athlete and exercise, with 30 Days, 3 Months, 12 Months, and All Time ranges. Longer ranges depend on your plan and appear disabled when not included. For a full set-by-set history, use History. The exercise-settings control, where offered for VBT, opens ROM, 1RM filters, and equations.
Configure the session before the first set
Open the header's settings control to check what you track and how sets end. You can set the Primary, secondary, and set metrics (for example velocity or power), the rest timer, Auto finish set, velocity loss and ranges, and audio feedback. Use Cloud decides whether these settings are shared with your organization's other devices or stay on this one. See Velocity feedback and Training settings.
3. Know when the workout starts
Opening VBT or selecting a lift prepares the recording context. The focused-session clock uses the persisted workout’s start time, which starts when work is committed—not simply because you opened the modal.
After you record the first set, it belongs to an active VBT workout. Changing the exercise can add further lifting work to that workout. Workout shows the currently selected exercise’s set list; Summary reviews the whole session.
4. Perform the set
With the context ready and recording unpaused, perform the lift. The first measured rep opens the encoder display; you do not need a separate VBT Start button.
The display contains:
- A large primary metric for the current repetition.
- A chart of the recorded repetitions.
- Configured secondary and set metrics.
- The idle auto-end countdown when enabled.
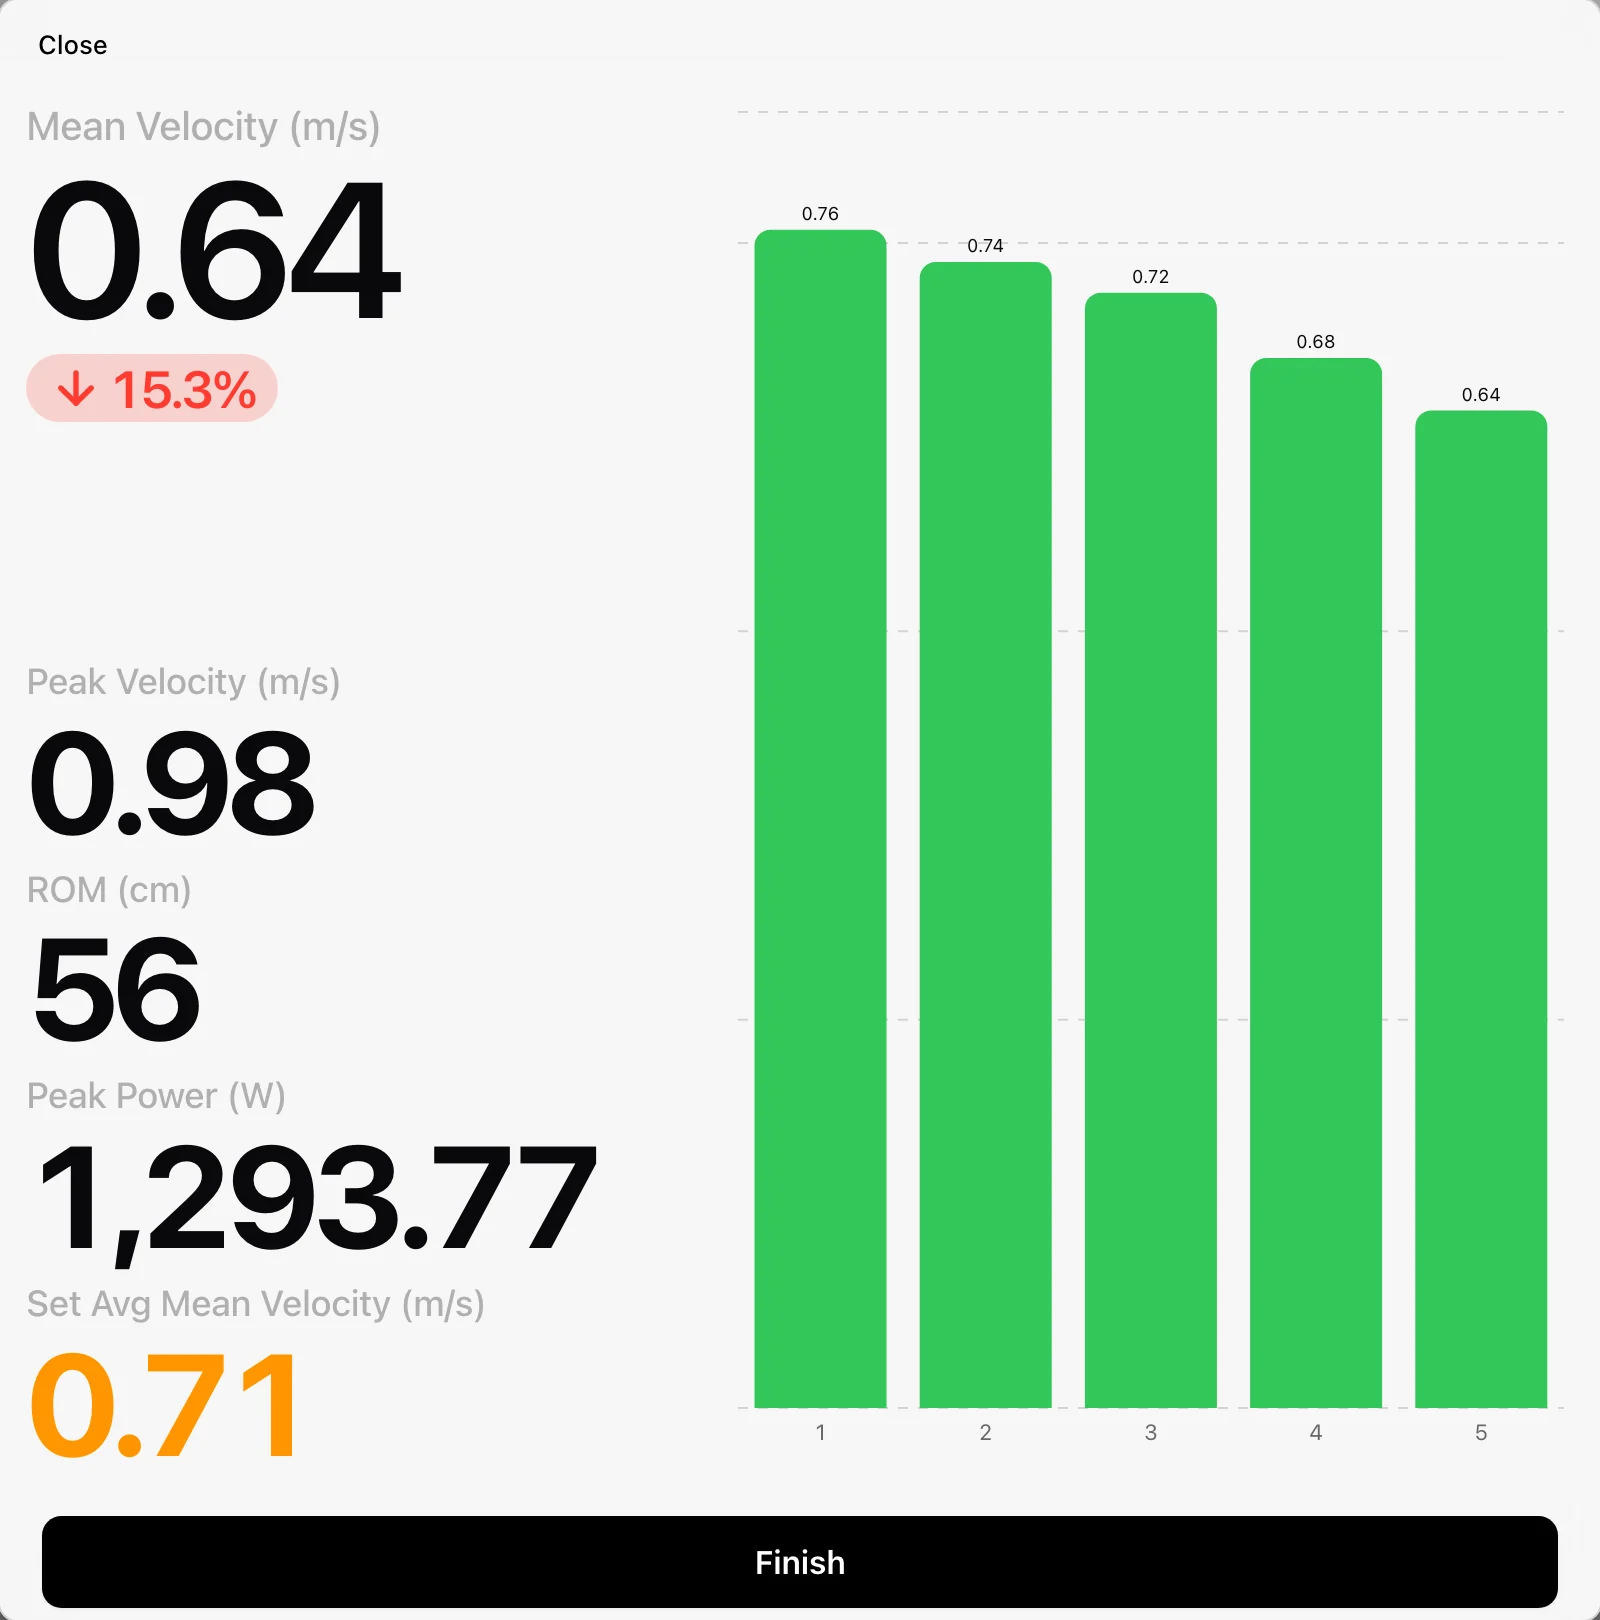
Keep the same metric across comparisons:
| Metric | Meaning |
|---|---|
| MV — Mean Velocity | Average over the concentric phase. |
| MPV — Mean Propulsive Velocity | Average over its propulsive portion. |
| PV — Peak Velocity | Highest instantaneous velocity. |
| ROM | Movement distance. |
| Force / Power | Calculated outputs dependent on inputs such as load. |
All velocity metrics use m/s, but they are not interchangeable. Eccentric halves are included in the display according to the Eccentric phase setting.
5. Finish and inspect the set
Select Finish on the recording display, or allow the configured inactivity countdown to finish it. If Auto finish set is off, the set stays open until you select Finish yourself. The set is then added to the selected exercise’s list. A display with no captured reps does not create measured repetitions just because it was opened and closed.
Close at the top of the display also keeps the reps it has recorded; it does not throw the set away.
Select the set card to expand its chart and rep rows. Its ⋯ provides Details, Repetitions, Change weight, Copy, compatible Paste repetition, and Delete as available.
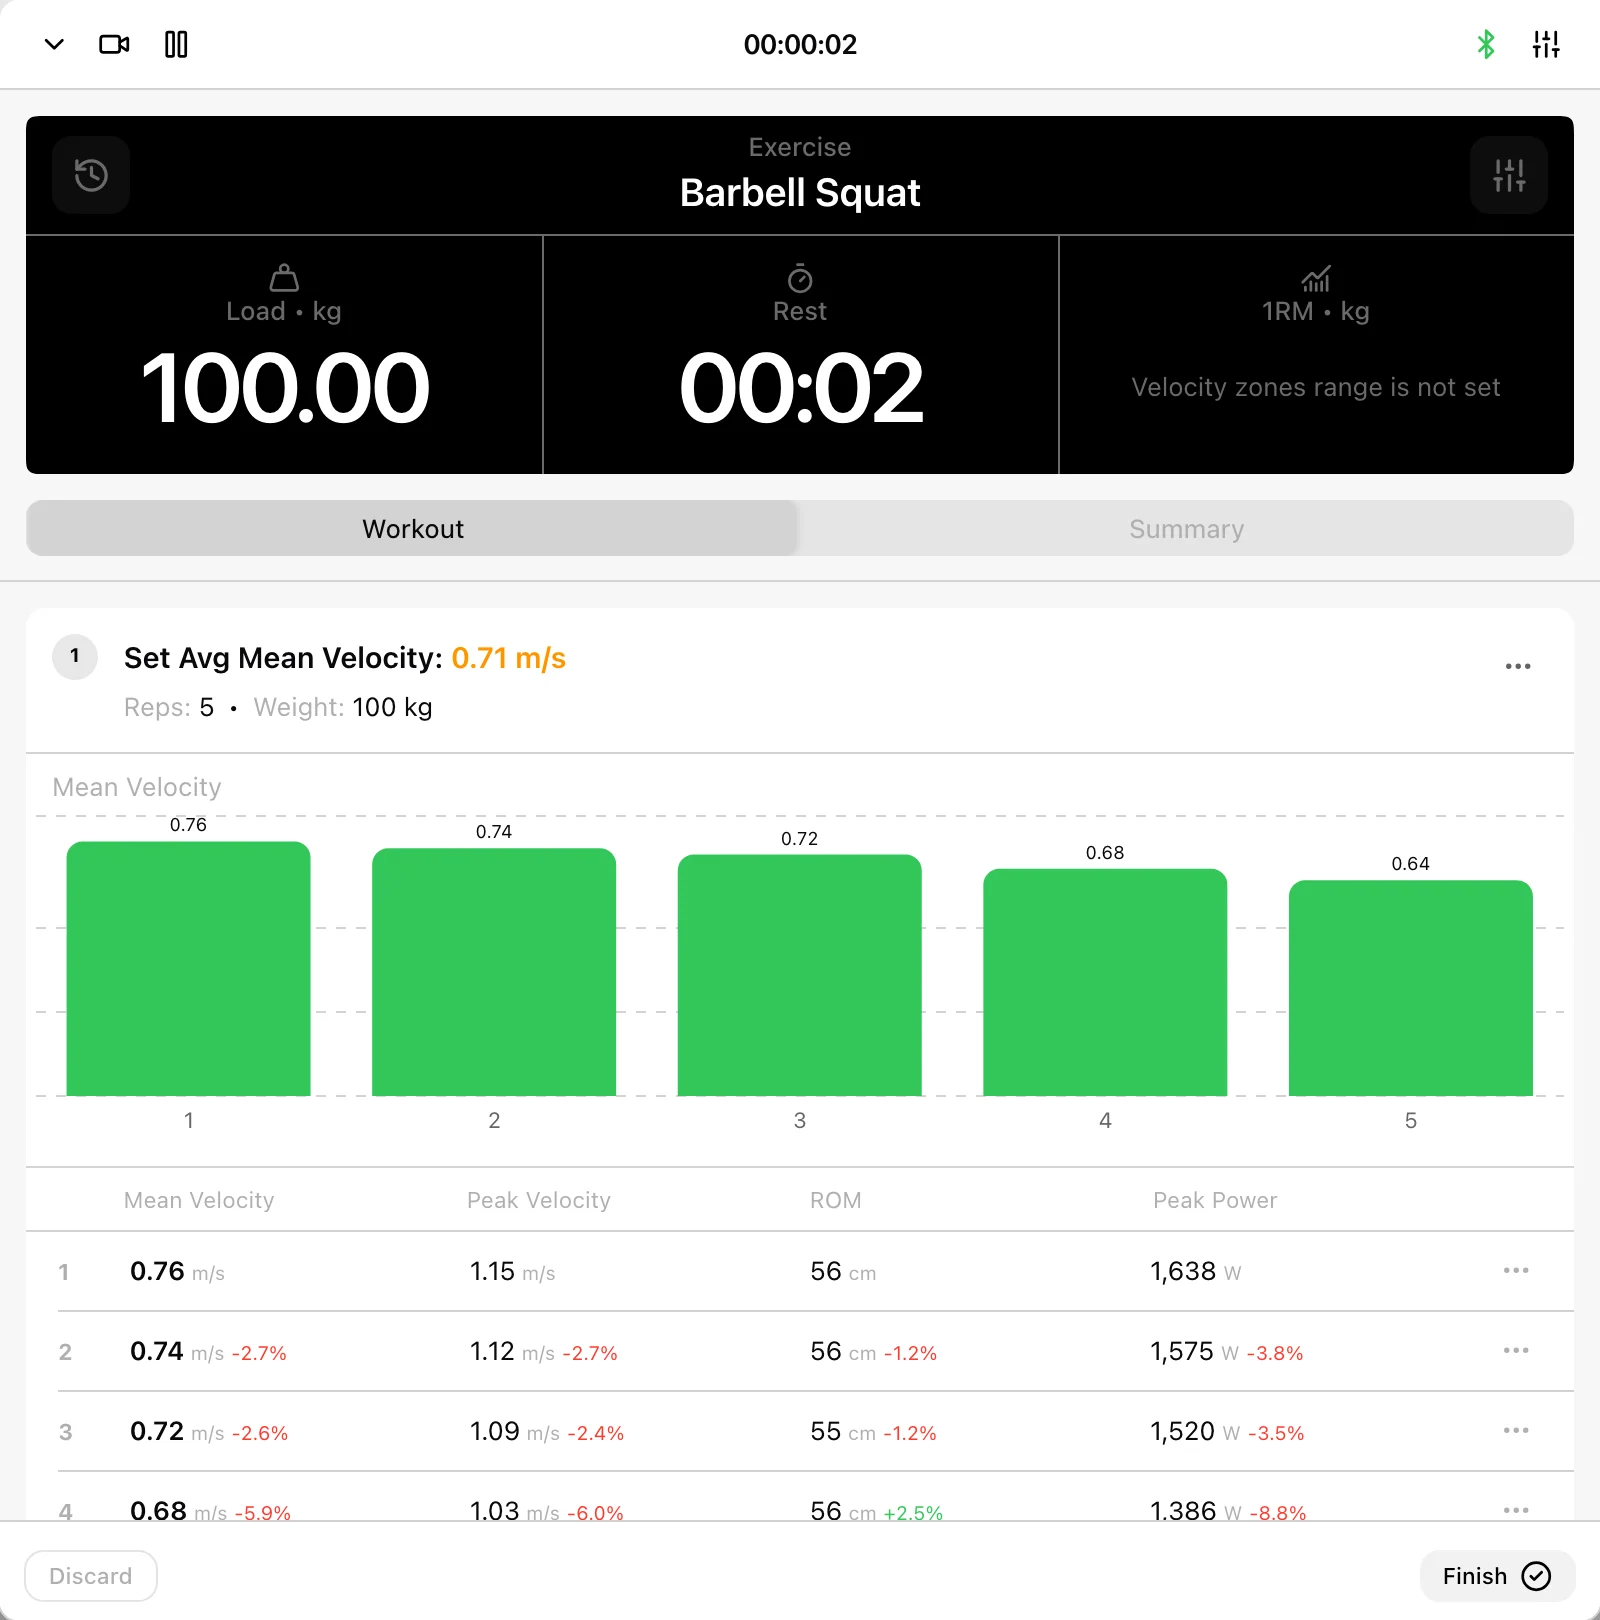
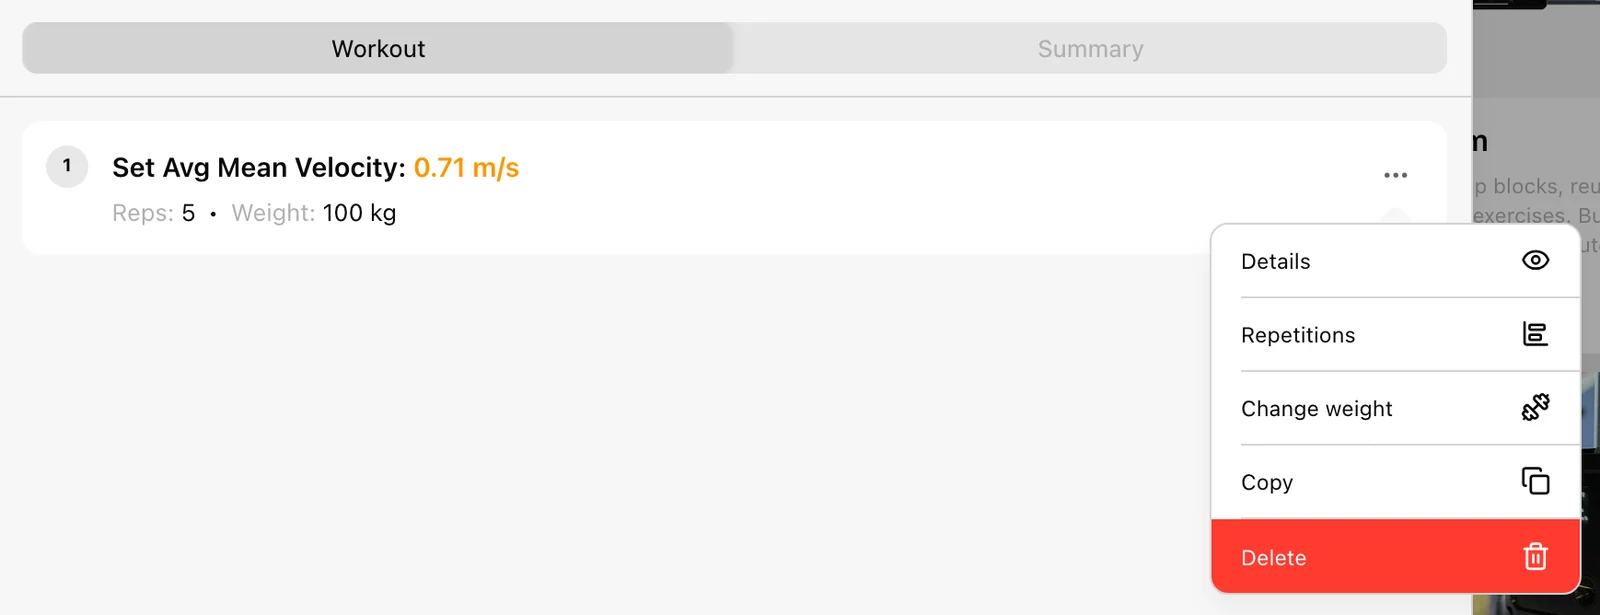
- Details shows the set's in-depth metrics, such as ROM, fatigue, velocity, and power.
- Repetitions shows each rep. Rep-level data includes metrics such as acceleration, range of motion (ROM), force and power output, rep duration, time to peak velocity, and the weight used.
- Change weight fixes a load that was entered wrongly.
- Delete removes the whole set permanently. You cannot undo it.
To remove a single ghost rep, an unwanted movement captured as a rep, delete just that repetition instead of the set.
For a bad rep or wrong entered load, follow Review and correct during training. Do not delete the whole workout when only one set needs attention.
Pause between recording tasks
The header’s Pause control stops encoder recording without finishing the whole session. Use Play to resume before the next set. A paused session is a different state from a disconnected device.
This can help avoid capturing unintended movements, or ghost reps, while you change exercises, adjust the encoder, or load plates. Check the pause state and active athlete again before lifting.
To switch exercise mid-session, select the exercise name in the header and choose a different movement. Earlier sets stay in the same workout.
Read 1RM and the calculator
The header’s 1RM card shows an available estimate/value or an explanation when it cannot be resolved. Select it to open 1RM Calculator and adjust the percentage slider.
The calculated percentage load is information; the slider does not automatically prove you changed the actual Load being recorded. Set that load to match what is on the bar.
The card shows the highest estimate from this exercise's sets in the session. See Estimate your 1RM during a training session for the full workflow. If the estimate is absent or implausible, check Equations and manual 1RM, the metric, athlete, exercise, filter, and access before changing your actual training.
Optional: the Video/live grid
The Video control opens the alternate live grid when the recording context is ready. Older help articles call this Vitruve Live. It shows your live metrics as widgets over the camera image, so you can film a set with its metrics on screen.
- Select Edit to arrange the layout. Use Add widgets to place metric widgets, then select Done. Each widget type can appear only once.
- Select the camera control to turn on the camera, and again to switch between the front and back cameras.
- In the installed app, select the round red record button to start recording the screen.
- Tap the screen to stop. The app confirms Video saved to gallery.
Allow camera and microphone access for Vitruve in your device settings first. Screen recording is available in the installed mobile app, not in a web browser. If no encoder is connected, the grid warns Encoder not connected, because live metrics need it. A video or layout change is not a completed workout save.
Finish the workout
Open Summary, review every exercise, set Name/RPE, and select the footer’s Finish. In Coach Mode, choose Only this athlete or All athletes, then confirm. Check processing, Pending workouts, and the saved History result.
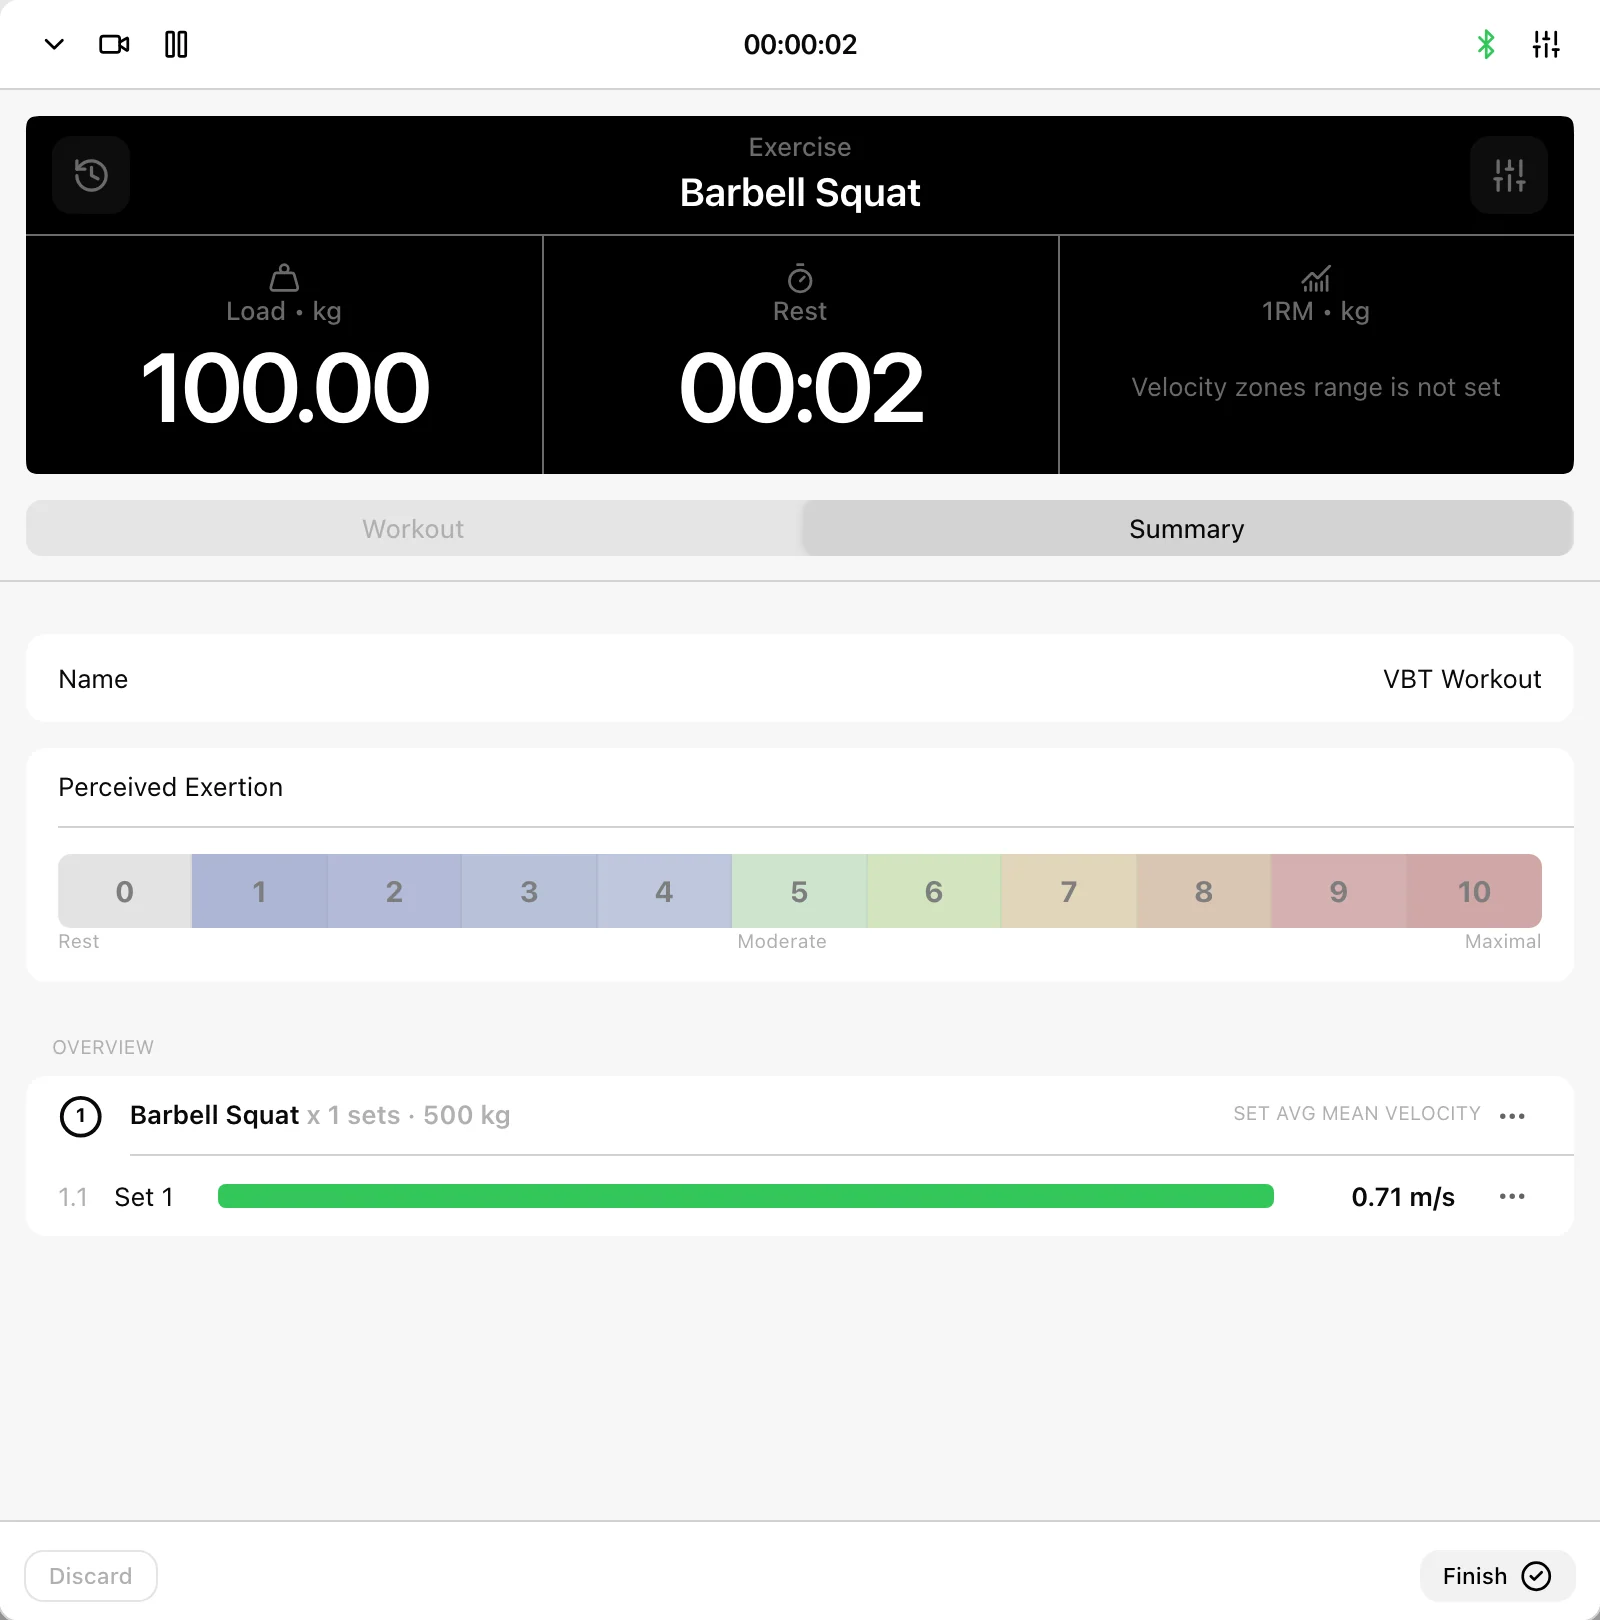
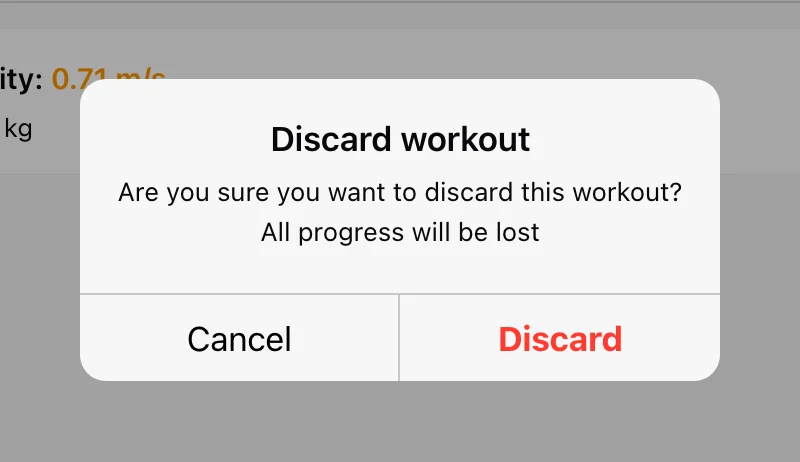
Finishing saves the workout to History and the athlete's progress. The footer's Discard removes the entire session instead, and you cannot undo it. Older help articles call this Cancel.
If recording is blocked
Check exercise, positive load, active compatible encoder, connection, and Pause. A workout holds at most 75 sets and 500 reps. If the workout reaches capacity, save the recorded workout and continue in a new one; inspect any message saying the last set was not recorded.
For missing reps or unexpected values, use Measurement troubleshooting.
Quick reference
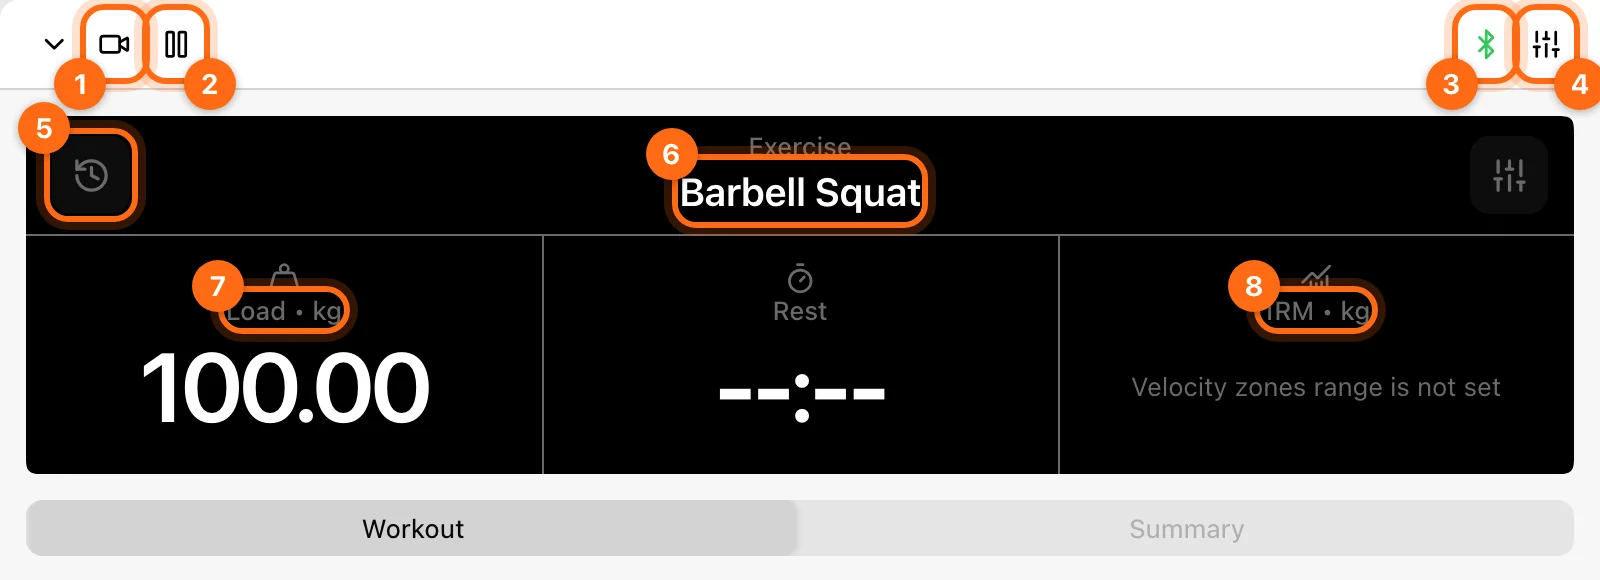
| Control | What it does |
|---|---|
| Pause / Play | Stops and resumes rep capture without ending the session, to avoid ghost reps. |
| Video | Opens the live grid to film sets with a metrics overlay. |
| History (beside the exercise) | Opens the exercise's progress view for the active athlete. |
| Bluetooth | Shows the connected encoder and connects a new one. Green means hardware is connected. |
| Settings | Metrics, rest timer, velocity loss, auto finish, and feedback. |
| Pencil / avatar | Chooses the athletes in the session and who lifts next. |
| Exercise / Load / 1RM | Switches lift, edits the weight on the bar, and opens the 1RM Calculator. |
| Set ⋯ | Details, Repetitions, Change weight, Copy, and Delete. |
| Footer Finish / Discard | Saves the whole workout, or permanently removes it. |
Perform a structured or mixed workout
Understand prescription tables, manual completion, the active-set marker, supersets, and combining lifting, jumps, sprints, and reaction work.
Record jump workouts
Use Vertical Jump, RSI Modified, or 10/5 Jump RSI; configure athlete inputs, wait through calibration, and save the recorded workout.